15 Charcuterie Board Presentation Tips for a Stunning Display
A charcuterie board can contain the finest cheeses, cured meats, fresh fruit, crackers, and spreads, but presentation is what makes people stop and look.
A thoughtfully arranged board feels abundant without looking messy, makes every ingredient easy to find, and encourages guests to try different combinations. Whether you’re preparing a small board for a date night or a generous spread for a holiday party, a few smart presentation techniques can make a dramatic difference.
The good news is that you don’t need professional food-styling experience to create an impressive display. The secret is understanding balance, color, texture, spacing, height, and ingredient placement.
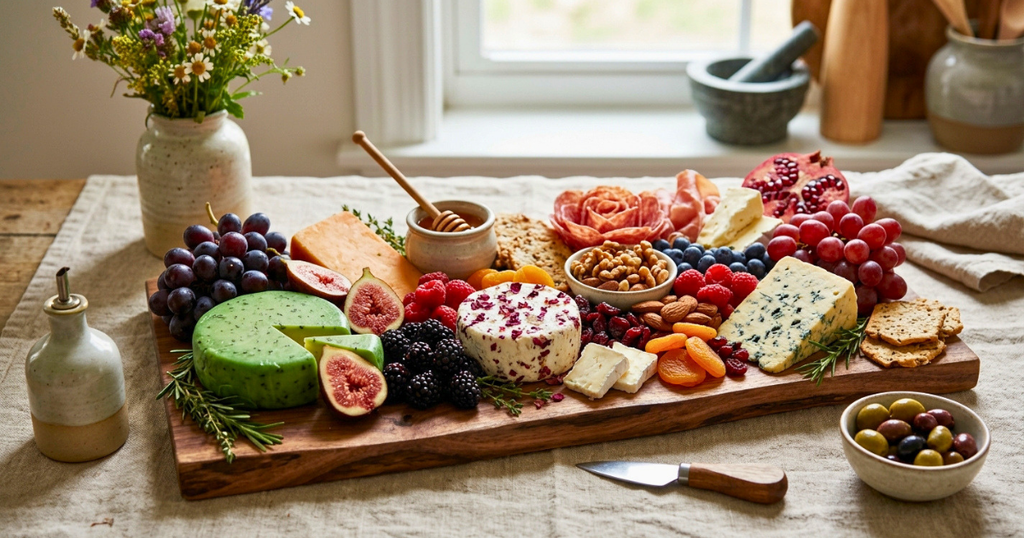
In this guide, you’ll learn practical charcuterie board presentation tips that can help you create a board that’s attractive, functional, and delicious—from choosing the right board to arranging the final garnish.
Table of Contents
Why Charcuterie Board Presentation Matters
People eat with their eyes first.
Before guests taste anything, they notice the overall appearance of the board. A colorful, well-organized arrangement creates an immediate impression and makes the food feel more inviting.
A good presentation also has a practical purpose.
When ingredients are thoughtfully positioned, guests can easily see:
- Which cheeses are available
- Where to find the crackers
- Which meats pair with particular cheeses
- Where the spreads and dips are located
- Which ingredients can be picked up easily
A beautiful board should therefore be visually appealing and easy to use.
Good Presentation vs. Poor Presentation
| Good Presentation | Poor Presentation |
| Balanced ingredients | One crowded section |
| Multiple colors | Mostly one color |
| Different textures | Everything looks identical |
| Small gaps filled naturally | Large awkward spaces |
| Ingredients easy to reach | Food piled too high |
| Clear focal points | No visual hierarchy |
| Variety of shapes | Repetitive arrangement |
The goal isn’t perfection. A slightly rustic board can actually feel more inviting than one that looks overly formal.
The 6 Principles of Professional Charcuterie Board Presentation
Before placing a single ingredient, keep six basic principles in mind:
1. Balance
- Distribute colors, textures, and larger ingredients across the board.
2. Contrast
- Combine light and dark ingredients, soft and crunchy textures, and large and small shapes.
3. Variety
- Give guests different flavors, colors, and textures to explore.
4. Height
- Create dimension by stacking, folding, layering, and using small bowls.
5. Flow
- Arrange ingredients so the eye naturally moves around the board.
6. Accessibility
- A beautiful board isn’t successful if guests can’t easily reach the food.
These principles work whether you’re creating a round board, rectangular board, wooden platter, or large grazing display.
Choose the Right Charcuterie Board
Your board itself becomes part of the presentation.
Before choosing ingredients, consider the size, shape, material, and number of guests.
Wooden Boards
Wood is one of the most versatile choices.
It provides a warm, natural background that works especially well with colorful fruits and cheeses.
Best for:
- Family gatherings
- Rustic entertaining
- Holiday parties
- Casual dinner parties
Marble Boards
- Marble creates a clean, sophisticated appearance.
- It works particularly well for elegant events and minimalist presentations.
Slate Boards
- Slate provides a dramatic dark background that makes lighter cheeses and colorful fruit stand out.
Serving Trays
- A tray can be especially useful for large gatherings because handles and raised edges make serving and moving easier.
Board Size Guide
| Board Size | Approximate Use |
| 10–12 inches | 2–4 people |
| 14–16 inches | 4–8 people |
| 18–20 inches | 8–12 people |
| 22+ inches | Large gatherings |
These are general planning ranges rather than strict serving rules. The amount of other food being served also matters.
Start With a Color Strategy
One of the easiest ways to improve charcuterie board presentation is to think about color before arranging anything.
A board can naturally include:
- White from Brie or goat cheese
- Yellow from cheddar
- Red from strawberries and cured meats
- Green from grapes and herbs
- Purple from figs or dark grapes
- Brown from nuts and crackers
- Orange from dried apricots
Instead of grouping every color, repeat colors across the board.
For example, if you place strawberries on the left side, add another red element such as salami or raspberries on the opposite side.
This creates visual balance.
Create a Focal Point
A professional-looking charcuterie board usually has one or two areas that immediately attract attention.
Your focal point could be:
- A Brie wheel
- A baked Camembert
- A bowl of colorful fruit
- A honeycomb
- A beautifully folded salami rose
- A small bowl of fig jam
Don’t make every ingredient equally dominant.
Choose one hero ingredient and build the rest of the arrangement around it.
Example:
For a holiday board, you could place a Brie wheel slightly off-center and surround it with:
Brie → prosciutto → grapes → crackers → nuts → dried fruit
This creates a natural visual path across the board.
Use the “Anchor and Fill” Method
One of the simplest presentation techniques is to divide ingredients into two groups:
Anchor Ingredients
These are large or visually important items.
Examples:
- Cheese wheels
- Cheese wedges
- Small bowls
- Meat roses
- Large fruit clusters
Filler Ingredients
These are smaller items used to complete the arrangement.
Examples:
- Nuts
- Berries
- Olives
- Dried fruit
- Crackers
- Pickles
Start with your anchors, then use fillers to connect everything.
This is much easier than trying to build the entire board randomly.
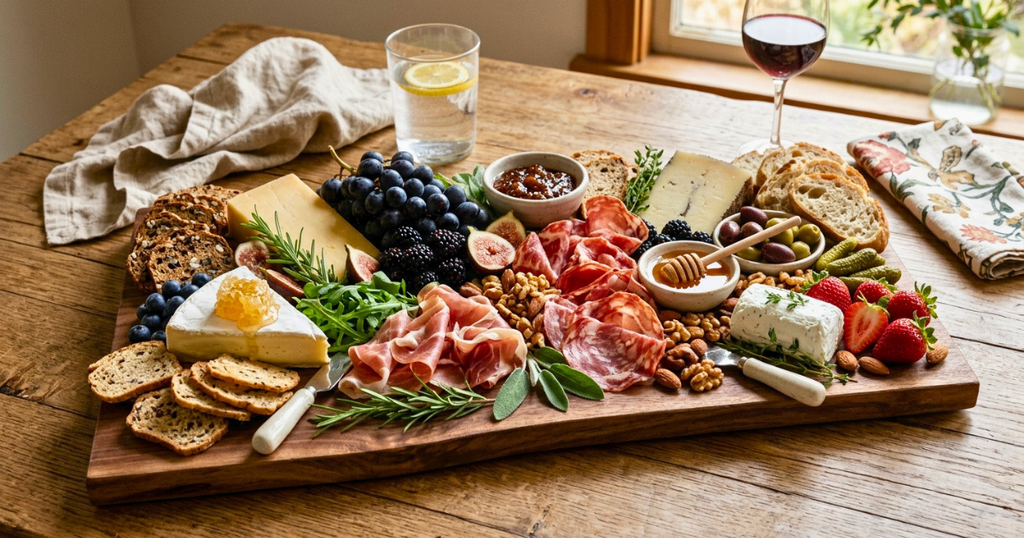
Step-by-Step: How to Arrange a Beautiful Charcuterie Board
Step 1: Place Small Bowls First
If you’re serving honey, jam, olives, mustard, or other wet ingredients, place their bowls first.
This gives you fixed points around which you can build the rest of the board.
Try placing two or three small bowls in different areas rather than lining them up.
Step 2: Add Your Largest Cheeses
Next, place the largest cheeses.
For example:
- Brie wheel
- Gouda wedge
- Manchego wedge
Don’t place them all together.
Spread them across different sections of the board to create balance.
Step 3: Add the Cured Meats
Now introduce your meats.
Instead of simply laying every slice flat, experiment with different shapes.
Try:
Folded salami: Fold each slice into quarters and arrange several together.
Prosciutto ribbons: Loosely fold or twist prosciutto to create height.
Salami roses: Layer thin slices in overlapping circles to create a flower-like shape. These techniques add movement and make the board look more abundant.
Step 4: Add Crackers in Multiple Areas
Avoid placing all your crackers in one pile.
Instead, divide them into two or three sections.
You can create:
- Small stacks
- Fan shapes
- Curved rows
- Overlapping clusters
Mixing cracker shapes can also add visual interest.
For Example: Combine round water crackers with long artisan crisps.
Step 5: Add Fresh and Dried Fruit
Fruit brings brightness to the board.
Place larger fruit clusters first, such as grapes or sliced pears.
Then use smaller berries to fill spaces.
Presentation Tip:
Don’t create one huge pile of fruit.
Small clusters distributed throughout the board usually look more intentional and make the ingredients easier to reach.
Step 6: Fill the Empty Spaces
This is where the board starts to look complete.
Use small ingredients to fill gaps:
- Almonds
- Pistachios
- Walnuts
- Olives
- Dried cranberries
- Apricots
- Blueberries
However, don’t feel obligated to fill every square inch.
Small pockets of space can actually make the board look cleaner.
Step 7: Add the Final Garnishes
Garnish should be the final step.
Try:
- Rosemary
- Thyme
- Mint
- Fresh basil
- Edible flowers
- Citrus slices
Use garnishes sparingly.
The food should remain the star of the presentation.
Use Texture to Make the Board More Interesting
A visually impressive board isn’t just about color.
Texture is equally important.
Imagine seeing:
Creamy Brie + crunchy crackers + juicy grapes + chewy dried fruit + crisp nuts + folded prosciutto
That variety makes the board more interesting before anyone takes the first bite.
Texture Guide:
| Texture | Examples |
| Creamy | Brie, goat cheese, Burrata |
| Firm | Cheddar, Manchego |
| Crunchy | Almonds, crackers |
| Juicy | Grapes, berries |
| Chewy | Dried apricots, dates |
| Crispy | Crostini, breadsticks |
Aim for several textures rather than repeating the same type throughout the board.
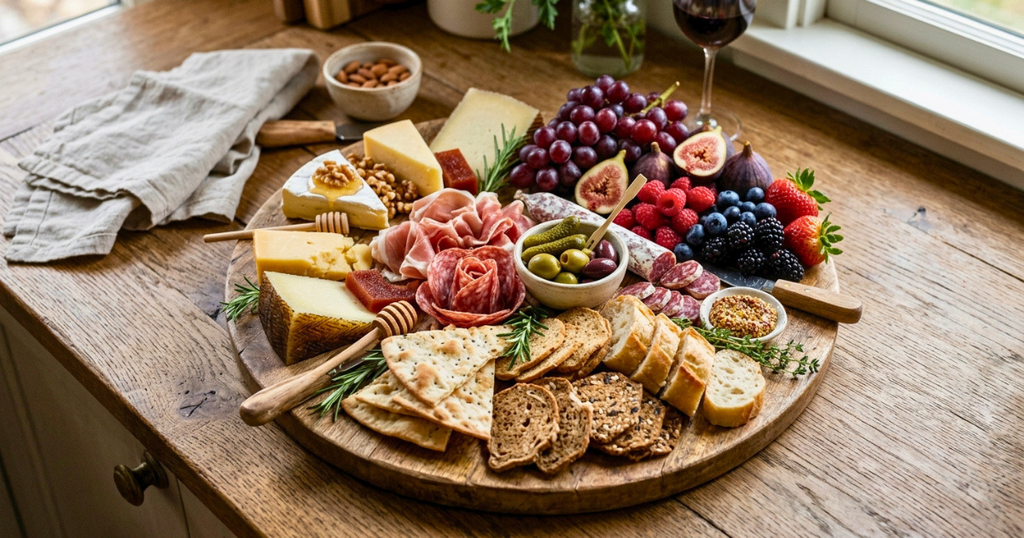
Add Height Without Making the Board Messy
Flat boards can look unfinished.
But excessive height can make a board difficult to serve.
The solution is subtle elevation.
Easy Ways to Add Height
- Stack crackers
- Fold meats
- Layer fruit
- Use small bowls
- Stand cheese wedges upright
- Create salami roses
- Place nuts in small piles
Think in layers rather than towers.
The goal is dimension—not instability.
Repeat Shapes for Visual Rhythm
Shape repetition is an underrated presentation technique.
If you have:
- Round Brie
- Round crackers
- Round grapes
spread them across the board rather than grouping them.
Similarly, long breadsticks can visually balance long slices of cheese or folded meat.
Repeating shapes creates a subtle sense of rhythm that makes the board feel intentional.
Keep Ingredients Easy to Reach
Presentation should never come at the expense of functionality.
Don’t place delicate ingredients behind tall piles of food.
Instead:
- Keep popular ingredients near the edge.
- Place bowls where multiple guests can reach them.
- Avoid creating deep piles.
- Leave room around cheeses for cutting.
- Provide appropriate serving utensils.
A guest shouldn’t have to dismantle your entire arrangement to reach a cracker.
The Best Presentation Formula
If you’re unsure where to start, use this simple formula:
3–5 Cheeses
- Choose different textures and flavor strengths.
2–4 Meats
- Mix shapes and styles.
2–3 Fruits
- Use both fresh and dried options.
2–3 Crunchy Elements
- Include crackers, nuts, or bread.
2–3 Spreads
- Honey, jam, mustard, or preserves.
2–3 Garnishes
- Use fresh herbs or other decorative touches.
This gives you enough variety without making the board unnecessarily complicated.
Presentation Mistakes That Make a Board Look Less Professional
Avoid these common mistakes:
Putting Everything in Separate Rows
- Rows can make the board feel rigid and cafeteria-like.
- Instead, overlap and cluster ingredients naturally.
Using Too Many Ingredients
- More isn’t always better.
- Too many ingredients can make the board look chaotic and make individual foods difficult to identify.
Ignoring Negative Space
- A completely packed board can feel cluttered.
- Leave small areas of breathing room.
Using Only One Color
- A board dominated by beige and brown ingredients can look dull.
- Add colorful fruit, vegetables, or garnishes.
Making Everything Perfectly Symmetrical
- Perfect symmetry can make a charcuterie board look artificial.
- A balanced but slightly organic arrangement usually feels more inviting.
Expert Presentation Tips at a Glance
| Presentation Goal | What to Do |
| Add visual balance | Distribute large ingredients |
| Create contrast | Mix light/dark colors |
| Add dimension | Layer and stack |
| Make it look abundant | Use clusters |
| Avoid clutter | Preserve small gaps |
| Improve accessibility | Place popular items near edges |
| Add elegance | Use simple garnishes |
| Create visual flow | Curve meats and crackers |
| Highlight cheese | Use contrasting accompaniments |
| Make photos better | Arrange colors throughout |
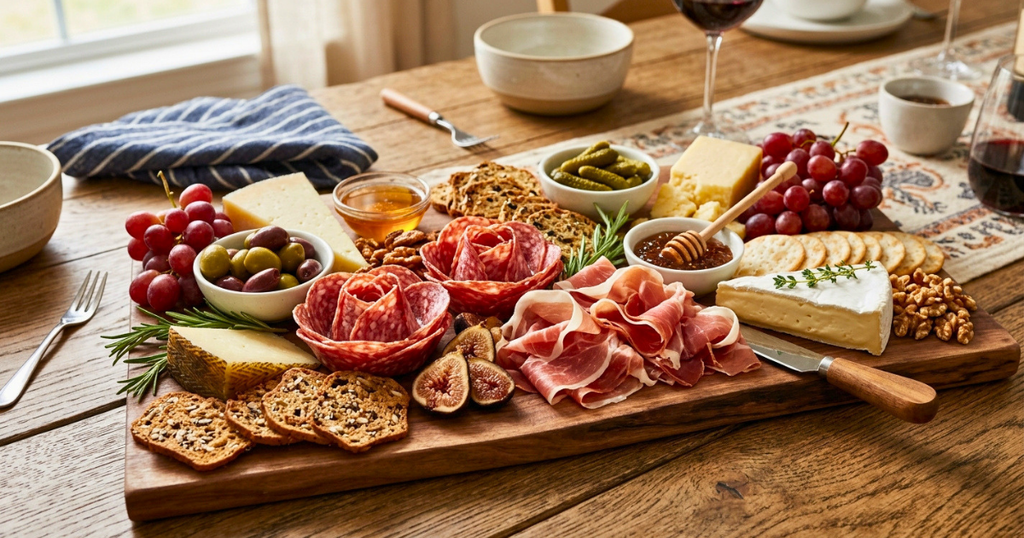
Charcuterie Board Presentation Tips: 15 Expert Ways to Create a Stunning Board
The foundation of a beautiful charcuterie board is balance, but the finishing details are what make it memorable. Once your cheeses, meats, fruits, crackers, and accompaniments are positioned, you can use a few advanced techniques to make the board look more abundant, intentional, and inviting.
The best part is that these techniques don’t require expensive ingredients or professional equipment. Small changes in placement, height, color, texture, and finishing details can completely transform the final presentation.
Advanced Charcuterie Board Presentation Tips
1. Build in Clusters Instead of Isolated Ingredients
One of the easiest ways to make a board look abundant is to create small clusters.
Instead of scattering individual almonds, berries, or crackers randomly, group similar ingredients together.
For example:
- A small cluster of grapes
- A fan of crackers
- A pile of almonds
- A few folded slices of salami
- A small group of dried apricots
Clusters create visual weight while keeping the board organized.
Pro Tip: Slightly overlap ingredients within each cluster. This creates depth without requiring extra food.
2. Create Visual Flow Around the Board
Your eyes should naturally move from one part of the board to another.
You can create this movement by repeating ingredients throughout the arrangement.
For example:
Brie → prosciutto → grapes → crackers → cheddar → strawberries
Rather than creating separate ingredient zones, allow different foods to interact.
This makes the board feel more organic and less like a collection of individual piles.
3. Use the “Triangle” Technique
The triangle technique is one of the simplest ways to create visual balance.
Choose three important ingredients and position them at different points on the board.
For example:
- Brie at the upper left
- Cheddar at the lower right
- A bowl of olives near the center
Then build smaller ingredients around those three anchor points.
This prevents the board from feeling heavily weighted toward one side.
4. Combine Light and Dark Ingredients
Contrast makes individual ingredients stand out.
Try pairing:
- White Brie with dark grapes
- Orange cheddar with green grapes
- Pale crackers with dark salami
- Creamy goat cheese with colorful berries
If everything has a similar color, the board can look flat.
A few strong color contrasts can make the entire arrangement more visually appealing.
5. Use Seasonal Ingredients
Seasonal ingredients can make a charcuterie board feel connected to the occasion.
Spring
Try:
- Strawberries
- Raspberries
- Fresh herbs
- Goat cheese
- Edible flowers
Summer
Try:
- Peaches
- Watermelon
- Blueberries
- Fresh figs
- Burrata
Fall
Try:
- Apples
- Pears
- Dried figs
- Pecans
- Cranberries
- Aged cheddar
Winter
Try:
- Pomegranate
- Pears
- Dried oranges
- Candied nuts
- Brie
- Dark chocolate
Seasonal color combinations also make excellent Pinterest content.
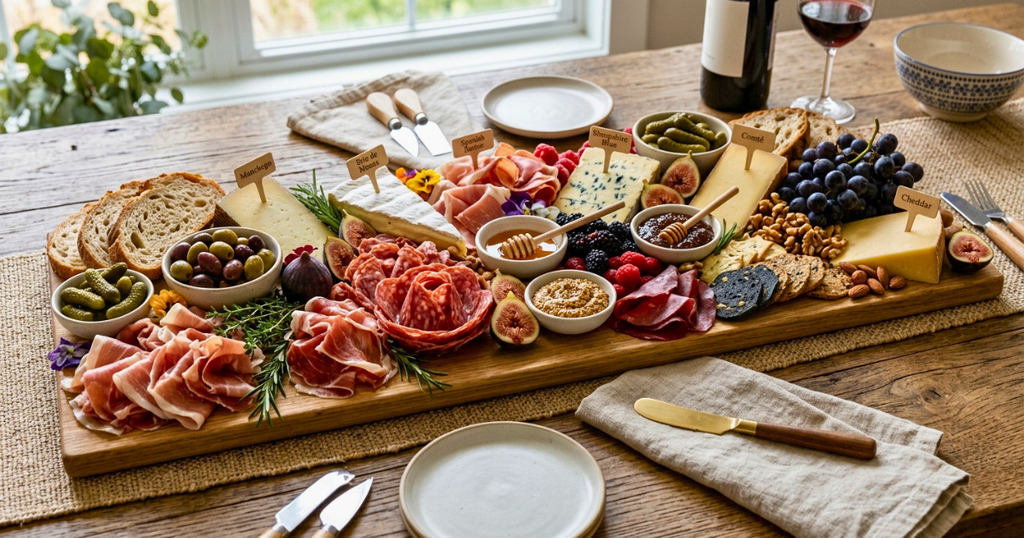
Presentation Ideas for Different Occasions
Elegant Dinner Party
For a sophisticated dinner, keep the presentation relatively minimal.
Use:
- 3–4 premium cheeses
- 2 cured meats
- Fresh fruit
- Artisan crackers
- One or two spreads
- Simple herbs
Avoid overcrowding.
A marble or dark wood board can create an elegant backdrop.
Birthday Party
A birthday board can be more colorful and playful.
Add:
- Colorful berries
- Chocolate
- Mini cookies
- Fun-shaped crackers
- Fruit
- Small sweets
Use the birthday theme’s colors when possible.
Holiday Charcuterie Board
Holiday boards are perfect for using seasonal colors.
For Christmas, combine:
Green grapes + red berries + white Brie + rosemary + crackers
For Thanksgiving:
Apples + pears + cranberries + pecans + aged cheese
The result feels festive without requiring decorative food items.
Bridal Shower
A bridal shower board often benefits from a softer, elegant palette.
Consider:
- Brie
- Goat cheese
- Strawberries
- Raspberries
- Grapes
- Honey
- Champagne-style crackers
- Edible flowers
Keep the presentation light and refined.
Picnic Charcuterie Board
For a picnic, prioritize practicality.
Choose ingredients that travel well:
- Firm cheeses
- Cured meats
- Grapes
- Apples
- Crackers
- Nuts
- Dried fruit
Avoid fragile ingredients if the board needs to travel far.
How to Make a Small Charcuterie Board Look Bigger
- You don’t need a huge board to create an impressive presentation.
Use Small Clusters
- Instead of spreading ingredients thinly across the entire board, create compact groups.
Use Bowls
- Small bowls add height and make the board look fuller.
Fold Meat
- Folded meat takes up less surface area while creating more visual volume.
Layer Crackers
- A small stack looks more substantial than individual crackers spread apart.
Use Color
- Bright berries and grapes can make a small board look more abundant.
How to Make a Large Charcuterie Board Look Organised
Large boards have the opposite challenge.
They can look empty if ingredients are spread too far apart.
The solution is to create multiple mini-compositions.
Think of the board as several connected sections rather than one giant surface.
For example:
- Section 1: Brie + prosciutto + grapes
- Section 2: Cheddar + salami + apples
- Section 3: Goat cheese + berries + honey
- Section 4: Manchego + crackers + olives
Then connect the sections with nuts, dried fruit, and herbs.
This creates a cohesive display without making the board look overcrowded.
Should You Use Garnishes?
Yes—but use them strategically.
Fresh herbs can add color and make a board look finished, but they shouldn’t dominate the food.
Best Garnishes
- Rosemary
- Thyme
- Mint
- Basil
- Fresh sage
- Edible flowers
Use garnishes in small amounts around the board.
Avoid using non-edible decorative materials where they can come into direct contact with food.
Add Labels for Better Presentation
Labels aren’t just practical—they can also improve the overall appearance.
Small food-safe labels can identify:
- Cheese names
- Meat varieties
- Spreads
- Specialty ingredients
This is especially useful when serving unfamiliar cheeses.
For a sophisticated look, use small neutral-colored cards or simple food markers that don’t compete with the food.
Think About Serving Direction
Before you finish the board, imagine several guests standing around it.
Can everyone reach:
- Cheese?
- Crackers?
- Fruit?
- Meat?
- Spreads?
If not, rearrange the board.
A round board is especially convenient because guests can approach from multiple directions. Use that by placing popular foods around the perimeter.
Use the Right Serving Utensils
A beautiful board can become frustrating if guests don’t have the correct tools.
Consider providing:
- Cheese knives
- Small spoons
- Serving forks
- Tongs
- Small spreaders
Use separate utensils for wet spreads and cheeses whenever practical.
Keep the Board Fresh Before Serving
Presentation can deteriorate if the board sits out too long before guests arrive.
For the best appearance:
- Prepare the main arrangement shortly before serving.
- Keep perishable ingredients properly chilled.
- Add delicate berries and herbs near serving time.
- Add crackers later if moisture is a concern.
- Give the board a final visual inspection before guests arrive.
15 Professional Charcuterie Board Presentation Tips
Here’s the complete formula you can save:
1. Start With the Right Board
- Choose a size appropriate for the number of guests.
2. Choose a Focal Point
- Make one ingredient the visual star.
3. Place Bowls First
- They establish the structure of the arrangement.
4. Add Large Cheeses
- Spread them across the board.
5. Fold the Meats
- Create movement and height.
6. Divide Crackers
- Use multiple sections instead of one pile.
7. Add Colorful Fruit
- Distribute bright colors throughout the board.
8. Fill Small Gaps
- Use nuts, berries, and dried fruit.
9. Create Height
- Stack, fold, and layer ingredients.
10. Repeat Colors
- Balance visual weight across the board.
11. Mix Textures
- Combine creamy, crunchy, juicy, chewy, and firm foods.
12. Don’t Overcrowd
- Leave enough room for guests to serve themselves.
13. Add Simple Garnishes
- Use herbs sparingly.
14. Provide Serving Tools
- Make every ingredient easy to enjoy.
15. Take a Final Look
- Check the board from every angle before serving.
Common Charcuterie Presentation Mistakes:
| Mistake | Why It Hurts Presentation | Better Approach |
| Everything is piled together | Ingredients become difficult to identify | Create distinct clusters |
| Too much space | Board can look unfinished | Add small fillers |
| No space | Board looks cluttered | Leave breathing room |
| One dominant color | Presentation looks flat | Add contrasting colors |
| All ingredients are flat | Little visual dimension | Add height |
| Too many garnishes | Food gets hidden | Use herbs sparingly |
| All crackers are together | Poor distribution | Divide into several sections |
| No serving utensils | Guests struggle to serve | Add appropriate tools |
| Overly symmetrical layout | Can look artificial | Use balanced asymmetry |
Even experienced hosts can make small mistakes.
A Simple Formula for a Pinterest-Worthy Board
If you’re creating a board specifically for photography or social media.
Try this formula:
1 Hero Cheese
- A visually recognizable centerpiece.
2–3 Supporting Cheeses
- Choose contrasting textures.
2–3 Meats
- Fold or shape them rather than laying them flat.
3 Colorful Fruits
- Use different colors.
2 Crunchy Elements
- Crackers + nuts work well.
2 Spreads
- Use small bowls.
1–2 Garnishes
- Keep them subtle.
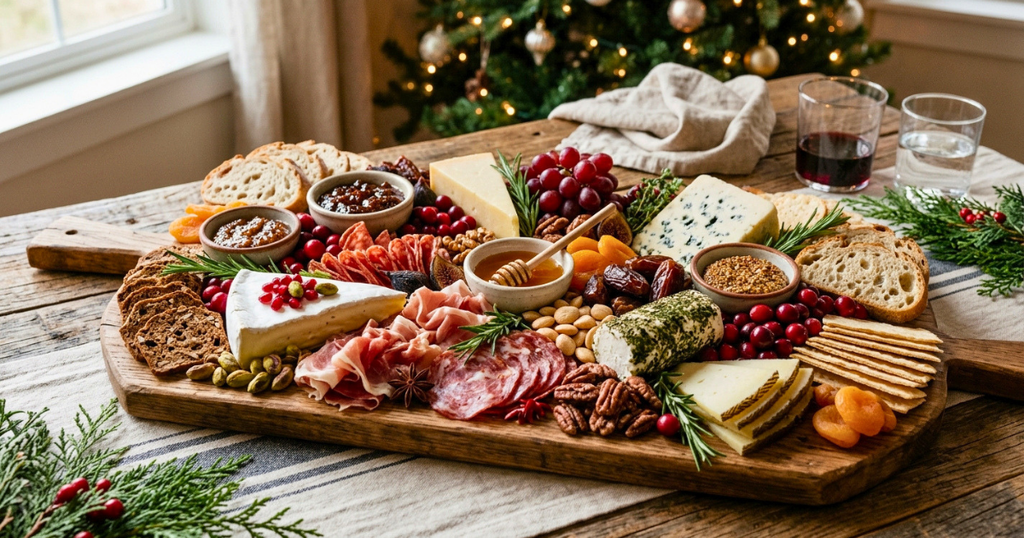
Then photograph the board from above and from a 45-degree angle.
FAQ of 15 Charcuterie Board Presentation Tips
1. How do I make a charcuterie board look professional?
- Start with large anchor ingredients, distribute colors evenly, create different heights and textures, use small clusters, and finish with simple garnishes.
2. What should go on a charcuterie board first?
- Place bowls and larger cheeses first. They establish the main structure before you add meats, crackers, fruits, and smaller ingredients.
3. How many cheeses should a charcuterie board have?
- Three to five varieties work well for most small and medium boards. Larger gatherings can support more varieties.
4. How do you make a charcuterie board look full?
- Use clusters of ingredients and fill small gaps with nuts, berries, olives, and dried fruit. Folding meats and stacking crackers also adds visual volume.
5. Should a charcuterie board be symmetrical?
- Not necessarily. Balanced asymmetry often looks more natural and visually interesting than perfect symmetry.
6. How do you add height to a charcuterie board?
- Stack crackers, fold meats, layer fruit, use small bowls, and position certain cheese wedges upright.
7. What colors look best on a charcuterie board?
- A combination of white, yellow, red, green, purple, and brown creates natural contrast. Try to distribute colors rather than grouping them.
8. What is the best board shape for presentation?
- Round, rectangular, and irregular wooden boards can all look beautiful. Choose based on the number of guests, available space, and the style of your gathering.
9. How far in advance can I arrange a charcuterie board?
- You can prepare many components ahead of time, but delicate ingredients, crackers, and fresh garnishes are often best added closer to serving time.
10. What makes a charcuterie board visually appealing?
- The combination of color, contrast, texture, height, spacing, and variety makes a board visually appealing.
11. How do you arrange meat on a charcuterie board?
- Fold thin slices, create salami roses, make loose ribbons with prosciutto, or arrange meats in overlapping sections rather than laying every slice flat.
12. Should you fill every space on a charcuterie board?
- No. Small areas of negative space can help separate ingredients and prevent the board from looking cluttered.
13. What are the best garnishes for a charcuterie board?
- Fresh rosemary, thyme, mint, basil, and edible flowers can add color and freshness when used sparingly.
14. How do I make a charcuterie board look expensive?
- Focus on presentation rather than price. Use a few quality ingredients, contrasting colors, thoughtful placement, attractive cheese cuts, and simple garnishes.
15. How can I make my charcuterie board Instagram-worthy?
- Create strong color contrast, add height, distribute ingredients evenly, use a clear focal point, and photograph the board in natural light from overhead or a 45-degree angle.
Final Thoughts
Great charcuterie board presentation isn’t about following a rigid design formula. It’s about creating a balance between beauty, variety, and practicality.
Start with your largest ingredients and build outward. Use bowls to create structure, distribute colors throughout the board, fold and layer meats for dimension, and use fruit, nuts, and dried ingredients to connect different sections.
Most importantly, don’t be afraid to embrace a little imperfection. A charcuterie board should feel abundant, welcoming, and easy to share—not like a display that guests are afraid to touch.
With these presentation techniques, you can turn simple ingredients into a centerpiece that looks thoughtfully styled and makes your next gathering feel special.