Serving trays made from handcrafted wood have a special charm. Unlike mass-produced items from big-box stores, a DIY wooden serving tray tells a story of creativity, effort, and personalization. A tray you built yourself would be a wonderful way to serve breakfast in bed or cocktails to guests. This guide will show you exactly how to make a wooden serving tray, covering everything from tool selection to food-safe finishing.
Our focus will be on cost savings, customization options, and the sheer joy of creating something both beautiful and useful. This step-by-step tutorial will help even complete beginners make a professional-looking tray that will last for years.
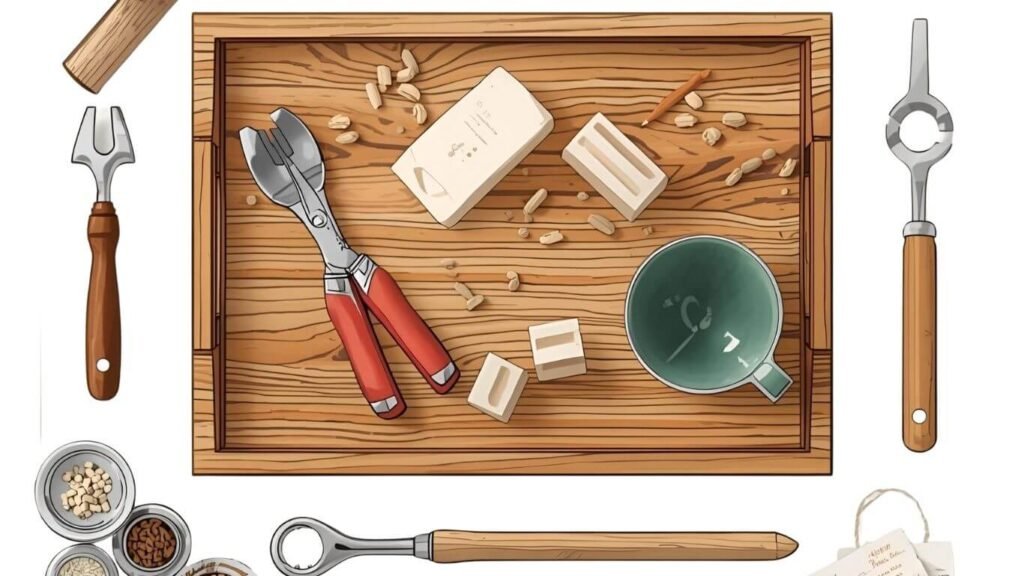
Tools and Materials You’ll Need
Before you begin this rewarding beginner woodworking project, it’s essential to gather the right tools and materials. Having everything ready will make the process smoother and more enjoyable.
Essential Tools for Beginners
You don’t need a professional workshop to get started. Many beautiful trays are built using only hand tools.
- Hand tools: A pull saw (like a Japanese Ryoba), a sharp chisel set, a hand drill, and a few sturdy clamps are the basics.
- Power tools (optional): To speed things up, a miter saw or table saw for precise cuts, a router for decorative edges, and an orbital sander for a smooth finish are great additions.
- Measuring tools: A reliable tape measure or ruler, a combination square for accurate 90-degree and 45-degree angles, and a sharp pencil for marking are non-negotiable.
- Safety equipment: Always prioritize safety. You will need safety glasses, a dust mask, and hearing protection (especially if using power tools).
Materials List
Here is what you’ll need to purchase for the tray itself.
- Wood selection: One pine board, sized 1×4×8ft, is perfect for beginners.
- Plywood base: A small piece of 21” birch plywood will serve as a stable bottom panel.
- Hardware: You’ll need quality wood glue, wood screws for reinforcement, and optional biscuits for stronger joinery.
- Handles: Choose from rustic rope handles, modern metal pulls, or create your own cut-out handles.
- Finishing supplies: Sandpaper (120 and 220 grit), your choice of wood stain, and a food-safe finish like mineral oil.
Cost Breakdown
- Total project cost: A basic tray can be built for just $10-$25, depending on your choice of wood and hardware.
- Time investment: Plan for 2-4 hours of active work, plus additional drying time for glue and finishes.
Choosing the Right Wood for Your Serving Tray
The type of wood you select will define your tray’s appearance, durability, and overall character. Finding the best wood for a serving tray depends on your skill level, budget, and desired aesthetic.
Best Wood Types for Beginners
These options are affordable, forgiving, and easy to work with.
- Pine: The go-to choice for first-time woodworkers. It’s inexpensive, widely available, and accepts stain beautifully, though it can be prone to dents.
- Poplar: Another soft wood that’s easy to cut and sand. Its smooth surface and subtle grain make it an excellent candidate for painted projects.
- Oak: For an advanced beginner ready for a challenge, oak is a durable, heavy hardwood with a prominent grain that looks fantastic with a simple oil finish.
Premium Wood Options
If you’re looking to create a high-end piece, consider one of these stunning hardwoods.
- Walnut: Known for its rich, dark color and beautiful grain patterns, walnut gives any project a premium, sophisticated appearance.
- Maple: This is a light-colored, dense hardwood that sands to an incredibly smooth finish, perfect for a modern or minimalist look.
- Acacia: A sustainable choice with a distinctive, often multi-toned grain, acacia is naturally durable and visually striking.
- Teak: Prized for its natural water resistance and durability, teak is an ideal choice for a tray that will frequently be exposed to moisture from drinks and food.
Wood Selection Tips
- Inspect every board: Before buying, check for warping, twisting, or large knots that could compromise your project. Lay the board on the floor to see if it lies flat.
- Choose kiln-dried lumber: This wood has been professionally dried to a stable moisture content, which helps prevent warping and cracking later on.
- Mind the grain: Look at the grain direction. A continuous or complementary grain pattern across your pieces will create a more cohesive and visually appealing final product.
Planning Your Tray Design
Before making a single cut, it’s crucial to have a clear plan. A good set of wood serving tray plans will save you time and materials. Consider the tray’s primary purpose—will it be for carrying coffee for two or serving drinks at a party?
Standard Dimensions
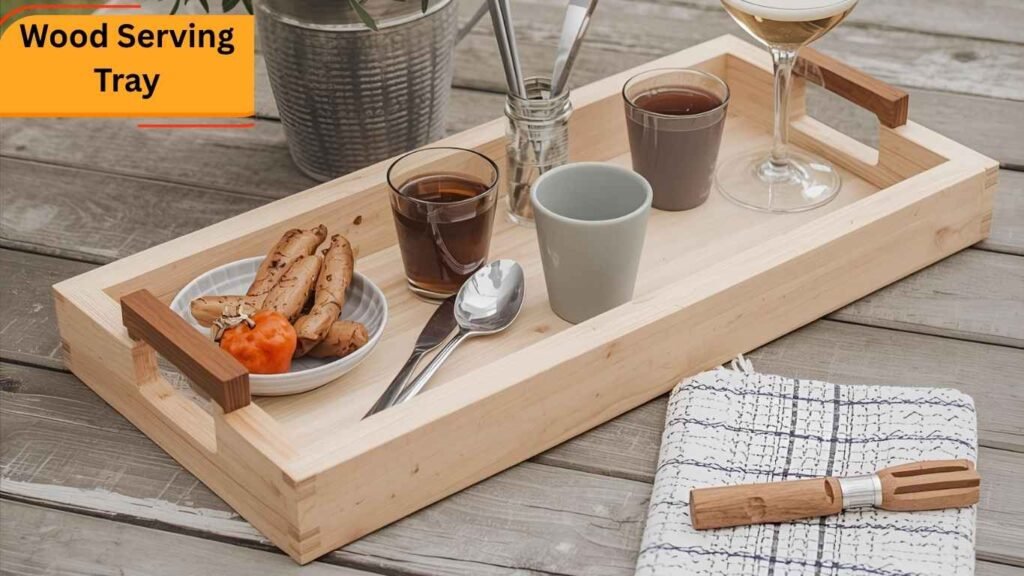
- Small tray: A size of around 12″×16″ is perfect for personal use, like a bedside or coffee table tray.
- Large tray: For entertaining, a larger size like 18″×24″ provides ample space for drinks and appetizers.
- Depth: A side height of 2-3 inches is practical, preventing items from sliding off while still allowing easy access.
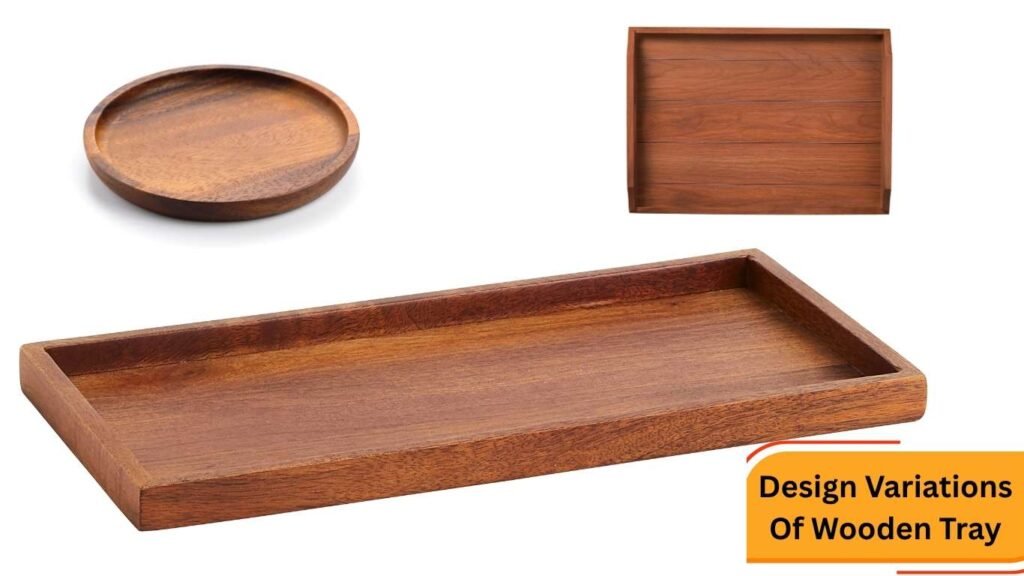
Design Variations
- Rectangular tray: The classic, most versatile design. It’s simple to build and suits any decor.
- Round tray: Offers a unique aesthetic but requires more advanced tools like a band saw or jigsaw to create.
- Herringbone pattern: A decorative arrangement of small wood pieces for the base, creating a stunning visual effect. This is a more advanced technique.
Handle Options
The handles are a key functional and aesthetic element of your wooden tray with handles.
- Cut-out handles: Simple, integrated handles created by drilling two holes and connecting them with a straight cut.
- Rope handles: Achieved by drilling holes in the sides and threading a thick rope through, this option provides a rustic, nautical look.
- Metal pulls: Cabinet or drawer pulls can be attached for a modern, polished, and professional appearance.
Step-by-Step Building Instructions
This is where your design comes to life. Follow this wooden serving tray tutorial carefully for the best results.
Step 1: Cut Your Wood to Size
Accuracy is key. Remember the woodworker’s mantra: “Measure twice, cut once.”
- Bottom Panel: Using a table saw or circular saw, carefully cut your 21” plywood to your desired final dimensions (e.g., 18″×24″).
- Side Pieces: Cut your 1×4 pine board into four pieces for the sides. For a professional look, set your miter saw to a 45-degree angle to create mitered corners. The long edge of each side piece should match the dimensions of the plywood base.
Step 2: Prepare the Wood Surface
Proper sanding is the difference between a homemade project and a handmade masterpiece.
- Start sanding all faces and edges of your cut pieces with 120-grit sandpaper to remove saw marks and smooth the surface.
- Follow up with 220-grit sandpaper for a silky-smooth finish.
- Use a tack cloth or a vacuum with a brush attachment to remove all sanding dust.
Step 3: Create Joinery (Optional)
While not strictly necessary for a basic tray, proper joinery adds strength and a professional touch.
- Simple butt joints: This is the easiest method for beginners. The end of one board is simply glued and screwed to the face of another.
- Biscuit joints: A biscuit joiner cuts a small slot in each mating piece. A wood “biscuit” is glued into the slots, which adds significant strength and helps with alignment during glue-up.
Step 4: Cut Handle Openings
If you opted for cut-out handles, now is the time to create them.
- On your two shorter side pieces, carefully measure and mark the location for your handles.
- Use a 1-inch drill bit (like a Forstner or spade bit) to drill a hole at each end of your marked handle area.
- Use a jigsaw or coping saw to cut out the wood between the two holes.
- Thoroughly sand the inside of the handle opening until it’s smooth and comfortable to grip.
Step 5: Test Fit Everything
Never skip the dry fit. This is your last chance to catch any errors before the glue makes them permanent.
- Assemble all your pieces without any glue or screws.
- Use clamps to hold the sides together around the plywood base.
- Check all your corners for a tight fit and ensure the assembly is square using a combination square. Make any necessary adjustments now.
Step 6: Glue and Clamp Assembly
This is the most critical step in your DIY tray woodworking project.
- Apply a thin, even layer of high-quality wood glue to all mating surfaces of the joints.
- Assemble the pieces and use bar clamps or corner clamps to apply firm, even pressure. Check again to ensure the tray is square.
- Use a damp cloth to immediately wipe away any excess glue that squeezes out of the joints.
- Let the assembly dry undisturbed for at least 24 hours.
Step 7: Final Sanding and Preparation
Once the glue is fully cured, it’s time for the final touches before finishing.
- If you used screws or nails, fill the holes with a matching wood filler and let it dry.
- Give the entire assembled tray a final sanding with 220-grit sandpaper, lightly rounding over any sharp edges.
- Thoroughly clean all dust from the surface.
Finishing Your Wooden Serving Tray
The finishing process protects the wood and brings out its natural beauty. This is a critical step in wooden serving tray finishing.
Staining Options
Stain adds color while allowing the wood grain to show through.
- Pre-stain conditioner: Essential for softwoods like pine, this product prevents the stain from appearing blotchy by ensuring even absorption.
- Popular stain colors: Timeless choices include Weathered Gray, Special Walnut, and Golden Oak.
- Application technique: Apply the stain with a foam brush or a clean rag, moving in the direction of the wood grain. Let it sit for a few minutes, then wipe off the excess with a clean cloth.
- Drying time: Always allow at least 24 hours between coats of stain or before applying a top coat.
Food-Safe Finishing
If you plan to place food directly on the tray, a food-safe finish is mandatory.
- Mineral oil: The best and most common choice for food contact surfaces. It’s inexpensive, easy to apply, and non-toxic.
- Beeswax: Often mixed with mineral oil, beeswax adds a layer of water resistance and a beautiful, low-lustre shine.
- Tung oil: A natural drying oil that cures to a hard, durable, and water-resistant finish. Ensure you purchase 100% pure tung oil, as some “tung oil finishes” contain chemical additives.
- Application: Apply a generous coat, let it soak into the wood for 15-20 minutes, then wipe away the excess. Repeat 2-3 times.
Protective Clear Coats
For a tray that will see heavy use with drinks, a protective clear coat is recommended (apply only to trays where food won’t have direct contact).
- Polyurethane: Offers excellent durability and protection against scratches and moisture. Choose a water-based formula for faster drying and less odor.
- Shellac: A natural, quick-drying finish that is considered food-safe once fully cured.
- Application tips: Apply in thin, even coats using a high-quality brush or foam applicator. Lightly sand with 220-grit sandpaper between coats for the smoothest result.
Maintenance Schedule
- Monthly oiling: For food-safe finishes, re-apply a coat of mineral oil once a month to keep the wood moisturized and protected.
- Deep cleaning: Use only gentle soap and warm water. Never soak the tray or put it in the dishwasher.
- Storage: Store your tray in a dry place away from extreme temperatures or humidity changes to prevent warping.
Common Mistakes to Avoid
Even seasoned woodworkers make mistakes. Here are a few common pitfalls for beginners to watch out for.
Planning and Measurement Errors
- Not checking wood for defects: Starting with a warped or twisted board will lead to frustration and a subpar result.
- Incorrect measurements: This is the most common mistake. Always measure twice and mark clearly before cutting.
- Skipping the dry-fit: Assuming everything will fit together perfectly often leads to discovering gaps or misalignments after the glue has been applied.
Assembly Problems
- Using too much glue: This creates a messy squeeze-out that can be difficult to clean up and can interfere with the final finish.
- Insufficient clamping pressure: Not using enough clamps or not applying even pressure can result in weak joints that fail over time.
- Not checking for square: Gluing up a project that isn’t square is a mistake that’s nearly impossible to fix later.
Finishing Mistakes
- Applying stain to unsanded surfaces: Stain will highlight any scratches or imperfections, so proper sanding is crucial.
- Skipping pre-stain conditioner: On woods like pine, this will almost certainly result in a blotchy, uneven finish.
- Not allowing proper drying time: Rushing between coats of stain or finish can lead to a soft, tacky surface that never fully cures.
Safety Tips for Woodworking Beginners
Your safety is more important than any project. Always follow these fundamental safety rules.
Personal Protective Equipment
- Always wear: Safety glasses are mandatory. A dust mask is crucial during sanding. Hearing protection is a must when using power tools.
- Avoid: Loose clothing, jewelry, or long hair that could get caught in machinery.
- Proper footwear: Always wear closed-toe shoes in the workshop.
Workshop Safety
- Clean workspace: A cluttered space is a dangerous space. Keep your work area clean of sawdust, scraps, and tripping hazards.
- Sharp tools: A sharp blade is a safe blade. Dull tools require more force, increasing the risk of slipping and injury.
- Focused attention: Avoid distractions. When you are operating a tool, give it your full and undivided attention.
Tool-Specific Safety
- Table saw: Always use push sticks for small pieces and ensure the blade guard is in place.
- Router: Securely clamp your workpiece and wear both eye and ear protection.
- Hand tools: Inspect tools like chisels and saws before each use to ensure they are sharp and in good condition.
Troubleshooting Common Issues
Ran into a problem? Don’t worry, most issues have a simple fix.
Assembly Problems
- Gaps in joints: Small gaps can be filled with a mixture of wood glue and sawdust from the project for a perfect color match.
- Uneven surfaces: If one side sits higher than another after glue-up, careful sanding with a block can level the surface.
- Weak joints: If a joint feels weak, you can add small decorative corner braces on the inside for reinforcement.
Finishing Issues
- Blotchy stain: The only fix is to sand the piece back down to bare wood and start over, this time using a pre-stain conditioner.
- Brush marks: Sand lightly between coats of clear finish with 220 or 320-grit sandpaper to remove imperfections.
- Dull finish: A food-safe oil finish may look dull after drying. Simply apply another thin coat and buff it out.
Long-term Maintenance
- Cracking wood: This is usually a sign of dryness. Regular oiling will prevent this.
- Stains and odors: Clean spills immediately. To remove strong odors like garlic, you can scrub the surface with salt and a lemon half.
- Warping: This is caused by changes in humidity. Storing the tray properly is the best prevention.
Design Variations and Upgrades
Once you’ve mastered the basic tray, why not try a more advanced design?
Decorative Techniques
- Herringbone pattern: Create a stunning base by cutting and arranging small, angled wood pieces.
- Contrasting wood strips: Inlay strips of a contrasting wood, like maple into walnut, for a high-end, custom look.
- Engraved personalization: Use a CNC machine, laser cutter, or even a hand-carving set to add initials, a date, or a design.
Functional Upgrades
- Compartments: Add dividers to create organized sections for different items.
- Collapsible legs: Attach folding legs to convert your serving tray into a convenient bed tray.
- Non-slip surface: Line the bottom of the tray with thin cork or rubber strips to keep items from sliding.
Advanced Joinery Options
- Dovetail joints: The hallmark of fine woodworking, these interlocking joints are incredibly strong and beautiful.
- Rabbet joints: A simple joint where a recess is cut into the edge of a board, allowing the plywood base to sit flush with the bottom of the sides.
- Splined miters: A thin piece of wood (a spline) is inserted into a slot cut across a mitered corner, adding strength and a decorative accent.
Cost Analysis: DIY vs. Store-Bought
Is it really worth the effort to build your own? Let’s break it down.
DIY Costs
- Materials: You can easily build a beautiful tray for $10-$25.
- Tools (one-time investment): A basic set of starter tools might cost $50-$200.
- Time investment: Around 4-6 hours total, including finishing.
Store-Bought Comparison
- Basic wooden trays: Retail prices typically start at $25 and can go up to $50.
- Premium handmade trays: Trays made from premium woods with fine joinery can cost $75-$150 or more.
- Mass-produced options: These often lack character and offer no customization.
Value Benefits of DIY
- Complete customization of size, wood, design, and finish.
- You learn valuable woodworking skills that you can apply to future projects.
- The immense satisfaction of creating functional art with your own hands.
- The potential to create personalized, high-quality gifts for family and friends.
Frequently Asked Questions
What’s the best wood for a beginner’s first tray?
Pine boards are the top recommendation. They are affordable, easy to work with, readily available at any home center, and are very forgiving of minor mistakes.
Do I need expensive tools to make a serving tray?
Not at all. A simple design can be completed with a basic set of hand tools. A pull saw, a drill, and some clamps are the minimum requirements to get started on this rewarding beginner woodworking project.
How long does the project take?
The active working time is typically between 2 and 4 hours. However, when you factor in the drying time for glue and multiple coats of finish, the entire project will take 2-3 days from start to finish.
Is it food-safe to eat directly off the wooden tray?
Yes, but only if you use a proper food-safe finish like 100% pure mineral oil, beeswax, or tung oil. You must maintain this finish by re-applying it regularly to ensure it remains safe for food contact.
Can I make this project without power tools?
Absolutely! Woodworking existed for centuries before power tools. Using traditional hand tools may take a bit longer and require more patience, but the results can be equally beautiful and satisfying.
Conclusion
You now have all the knowledge you need to build a stunning and durable wooden serving tray. We’ve covered everything from selecting the right wood and tools to detailed construction steps and professional finishing techniques. The beauty of this project lies not only in the final product but in the process of creating it. By making your own tray, you gain new skills, save money, and create a custom piece that perfectly suits your style.
So, gather your materials and dedicate a bit of time to this project. Embrace the process, learn from any mistakes, and take pride in your work. Start your first tray project this weekend and discover the satisfaction of turning a simple piece of wood into something both functional and beautiful. Remember to always prioritize safety and enjoy the journey.