How to Arrange a Round Charcuterie Board for a Perfect Party You’ll Love
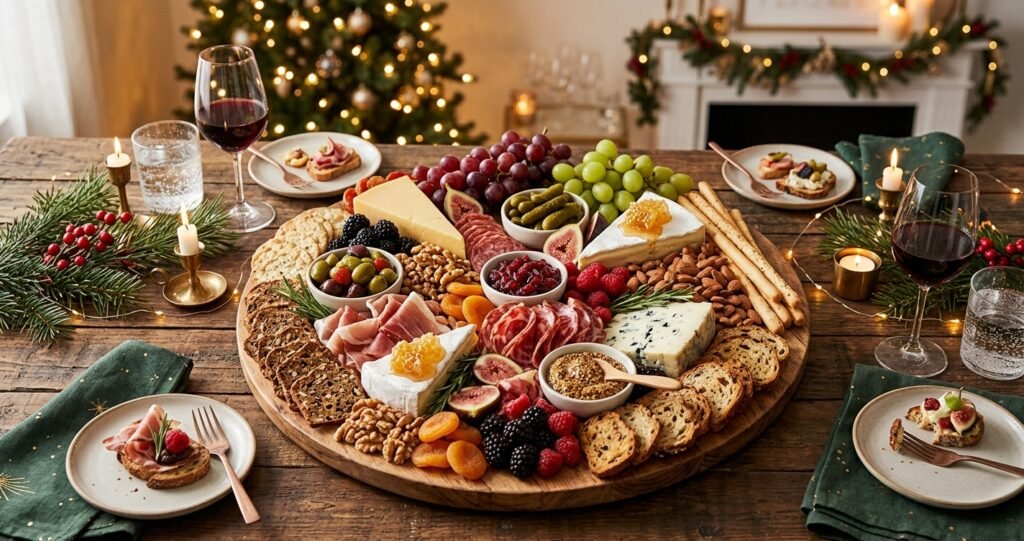
A round charcuterie board is more than just a serving platter—it’s a beautiful centrepiece that brings people together. Whether you’re hosting a wine night, holiday dinner, birthday party, bridal shower, or casual gathering with friends, learning how to arrange a round charcuterie board can transform simple ingredients into an impressive display that’s both delicious and visually appealing.
Unlike rectangular or grazing boards, a round charcuterie board requires a slightly different approach. The circular shape naturally draws the eye toward the center, making balance, symmetry, and ingredient placement even more important. Without a plan, it’s easy to overcrowd one side, leave awkward gaps, or create a board that’s difficult for guests to enjoy.
The good news? You don’t need to be a professional food stylist. By following a few expert techniques, you can create a charcuterie board that looks elegant, photographs beautifully, and offers the perfect combination of flavours and textures.
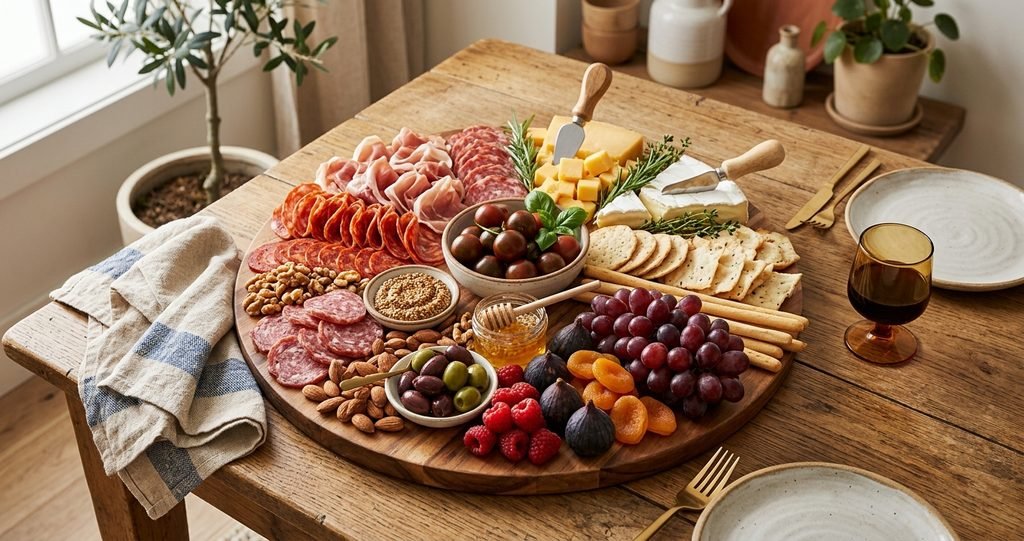
In this complete guide, you’ll learn exactly how to arrange a round charcuterie board, including ingredient selection, layout ideas, styling secrets, and practical hosting tips that work for any occasion.
Table of Contents
Why Choose a Round Charcuterie Board?
Round boards have become increasingly popular because they naturally create a balanced and elegant presentation.
Instead of organizing ingredients in straight rows, a circular board encourages movement and makes the arrangement feel organic.
Benefits of a Round Charcuterie Board
| Benefit | Why It Matters |
| Beautiful Presentation | The circular shape creates a balanced display. |
| Easy Guest Access | Guests can serve themselves from every angle. |
| Great for Photos | Round boards are highly shareable on Pinterest and Instagram. |
| Flexible Layout | Works well for small and medium gatherings. |
| Elegant Appearance | Ideal for holidays, weddings, and celebrations. |
Choosing the Right Round Board
Not every round serving board is ideal for charcuterie.
Look for a board that is:
- Food-safe
- Durable
- Easy to clean
- Large enough for your guest count
- Stable with a flat surface
Best Materials
- Wooden boards
- Bamboo boards
- Marble boards
- Slate serving boards
For beginners, a 12–16 inch wooden or bamboo board is a great choice because it offers plenty of space while remaining easy to style.
What You’ll Need
Before arranging your board, gather all your ingredients and serving accessories.
Cheese
Choose three to five varieties:
- Brie
- Sharp Cheddar
- Gouda
- Goat Cheese
- Manchego
Meats
- Prosciutto
- Genoa Salami
- Soppressata
- Capicola
Fresh Fruit
- Grapes
- Strawberries
- Blueberries
- Blackberries
- Apple slices
- Pear slices
Crunchy Items
- Water crackers
- Artisan crackers
- Breadsticks
- Crostini
Extras
- Honey
- Fig jam
- Mixed nuts
- Olives
- Cornichons
- Dark chocolate
- Dried apricots
Fresh rosemary or thyme adds a professional finishing touch.
How Much Food Do You Need?
Use this serving guide when planning your board.
| Guests | Cheese | Meat | Crackers | Fruit |
| 2–4 | 12 oz | 8 oz | 1 box | 2 cups |
| 6–8 | 1.5 lbs | 1 lb | 2 boxes | 3 cups |
| 10–12 | 2.5 lbs | 2 lbs | 3 boxes | 5 cups |
| 15–20 | 4 lbs | 3 lbs | 4 boxes | 8 cups |
If the board is the main meal, increase quantities by about 50%.
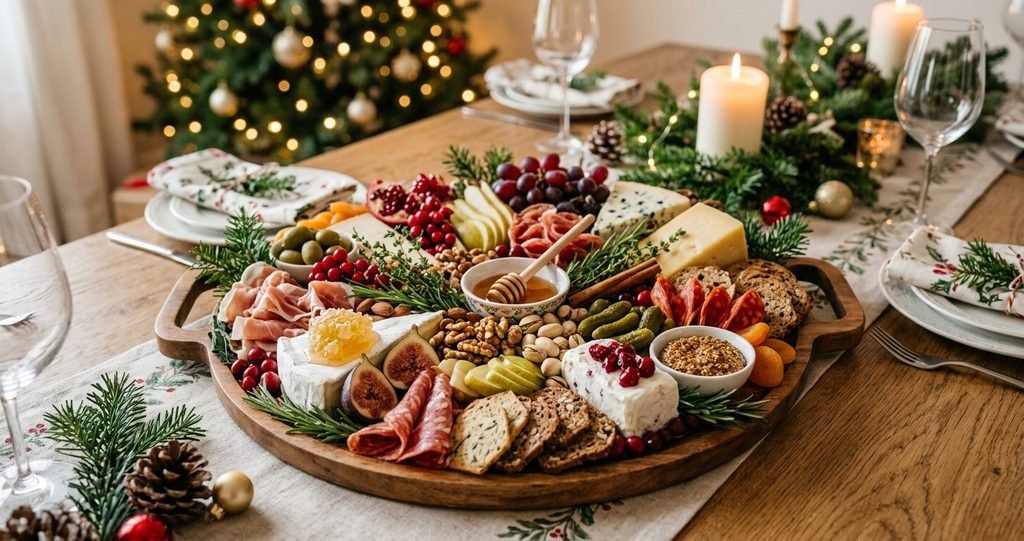
Plan Your Layout Before You Start
One of the biggest differences between a beginner board and a professional-looking one is planning.
Don’t place ingredients randomly.
Instead, visualize the board as a clock.
Imagine sections at:
- 12 o’clock
- 3 o’clock
- 6 o’clock
- 9 o’clock
This simple trick helps distribute ingredients evenly and creates natural balance.
Step 1: Place the Bowls First
Professional food stylists almost always begin with bowls.
Small bowls act as visual anchors and help organize the board.
Use bowls for:
- Honey
- Fig jam
- Olives
- Nuts
Placement Ideas
For a medium-sized round board:
- One bowl in the center
or
- Three small bowls placed in a triangle
This creates a balanced foundation for the remaining ingredients.
Step 2: Add the Largest Cheeses
Now position your biggest cheeses.
Examples:
- Brie wheel
- Camembert
- Cheddar wedge
Spread them evenly around the board instead of grouping them.
Imagine creating a triangle between each cheese.
This keeps the board balanced from every angle.
Step 3: Arrange the Meats
Once the cheese is in place, arrange cured meats nearby.
Instead of laying slices flat, create visual interest by using:
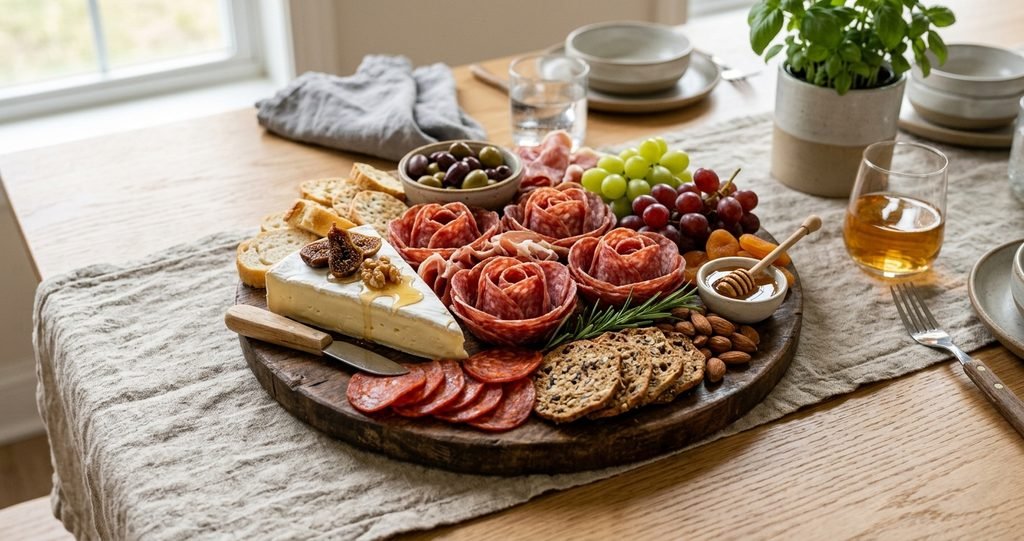
- Salami roses
- Prosciutto ribbons
- Folded salami
- Meat fans
These techniques add height, texture, and movement.
Step 4: Create Circular Flow
One of the best features of a round board is the natural circular movement.
Instead of building in straight lines, gently curve ingredients around the board.
For example:
- Grapes follow the board’s edge.
- Crackers create a soft arc.
- Salami overlaps in curved rows.
This emphasises the board’s shape and creates a more polished look.
Step 5: Fill the Gaps
Once the main ingredients are placed, begin filling empty spaces.
Perfect fillers include:
- Almonds
- Pistachios
- Olives
- Blueberries
- Blackberries
- Dried fruit
The goal is to eliminate large empty spaces while keeping each ingredient visible.
Create a Balanced Colour Palette
Professional charcuterie boards rely heavily on color.
Aim for an even mix of:
- Red (strawberries, salami)
- Green (grapes, herbs)
- White (Brie)
- Yellow (Cheddar)
- Purple (figs, grapes)
- Brown (nuts, crackers)
When these colors are evenly distributed, the board instantly feels fuller and more inviting.
Styling Tips for a Picture-Perfect Round Board
✔ Build outward from the center.
✔ Repeat colors across the board.
✔ Use different textures.
✔ Leave a little breathing room.
✔ Stack some ingredients to create height.
✔ Cut some cheese before serving.
✔ Garnish at the end.
These small details make a huge difference in both presentation and guest experience.
Best Cheese and Meat Pairings for a Round Charcuterie Board
Creating the perfect charcuterie board isn’t just about adding your favorite ingredients—it’s about pairing flavors that complement one another. Offering a variety of combinations encourages guests to mix and match while creating a more memorable tasting experience.
| Cheese | Best Meat Pairing | Recommended Spread |
| Brie | Prosciutto | Honey |
| Sharp Cheddar | Genoa Salami | Whole Grain Mustard |
| Gouda | Capicola | Apricot Jam |
| Manchego | Chorizo | Quince Paste |
| Goat Cheese | Prosciutto | Hot Honey |
| Parmesan | Soppressata | Fig Jam |
Expert Tip: Place paired ingredients close together so guests naturally discover complementary flavors.
The Best Fruits for a Round Charcuterie Board
Fruit adds freshness, sweetness, and vibrant color while balancing salty meats and rich cheeses.
Fresh Fruit Ideas
- Green Grapes
- Red Grapes
- Strawberries
- Blackberries
- Blueberries
- Apple Slices
- Pear Slices
- Fresh Figs
- Cherries
- Orange Segments
Dried Fruit Ideas
- Apricots
- Cranberries
- Dates
- Figs
- Mango
Arrange fruits in small clusters rather than large piles to maintain visual balance across the round board.
How to Place Crackers Without Overcrowding
Many beginners make the mistake of placing all the crackers in one area.
Instead, divide them into three or four smaller sections around the board.
Try mixing:
- Round crackers
- Artisan crackers
- Crostini
- Breadsticks
- Seeded crisps
This makes the board easier to access from every side.
Add Height for a Professional Look
Professional charcuterie boards don’t look flat.
Create height by:
- Stacking crackers
- Folding salami into roses
- Layering grapes
- Standing cheese wedges upright
- Using small bowls for spreads
Even a little elevation makes the presentation feel more dynamic.
Finishing Touches That Make a Big Difference
The last five minutes of styling often have the biggest visual impact.
Add:
- Fresh rosemary
- Fresh thyme
- Edible flowers
- Honey drizzle
- Honeycomb
- Microgreens
- Citrus slices
These small details make your round charcuterie board feel elegant and thoughtfully designed.
Round Charcuterie Board Layout Ideas
1. Classic Circular Layout
Best For:
- Family gatherings
- Holidays
- Dinner parties
Cheese is spaced evenly around the board with meats, fruit, and crackers arranged in soft curves.
2. Centrepiece Layout
Place one large Brie wheel or Camembert in the center.
Build outward using curved rows of meats, crackers, fruit, and nuts.
This creates a dramatic focal point.
3. Seasonal Layout
Perfect for:
- Christmas
- Thanksgiving
- Fall gatherings
- Spring brunches
Use seasonal fruits, themed garnishes, and festive colors.
4. Wine Night Layout
Feature:
- Premium cheeses
- Artisan crackers
- Honey
- Dark chocolate
- Fresh figs
A minimalist arrangement allows the cheese to remain the star.
Common Mistakes to Avoid
Even beautiful ingredients can result in an unbalanced board if they’re not arranged thoughtfully.
| Mistake | Better Solution |
| Placing all cheeses together | Spread cheeses evenly around the board |
| Using only one texture | Mix soft, hard, creamy, and crumbly cheeses |
| Overfilling the board | Leave enough space for guests to serve comfortably |
| Forgetting color balance | Distribute fruits and herbs across the board |
| Skipping bowls | Use bowls for jams, olives, and honey |
| Adding herbs too early | Garnish just before serving for maximum freshness |
| Using only one cracker type | Offer a variety of shapes and textures |
Professional Styling Secrets
Food stylists use a few simple techniques that instantly elevate a charcuterie board.
- Work in Odd Numbers: Arrange cheeses, bowls, and fruit clusters in groups of three or five whenever possible. Odd numbers often look more natural and visually appealing.
- Repeat Colors: If you place strawberries on one side of the board, include another red element—such as salami or raspberries—on the opposite side. This creates visual harmony.
- Keep It Balanced: As you build the board, step back occasionally to check that no single section looks too heavy or empty.
- Leave Small Gaps: A completely packed board can feel cluttered. A little breathing room makes each ingredient easier to see and enjoy.
Quick Styling Checklist
Before serving, ask yourself:
- Are the cheeses evenly spaced?
- Are meats folded or shaped attractively?
- Are fruits distributed throughout the board?
- Are there enough crackers in multiple sections?
- Have you filled all empty spaces naturally?
- Are serving utensils included?
- Have fresh herbs been added?
- Does the board look balanced from every angle?
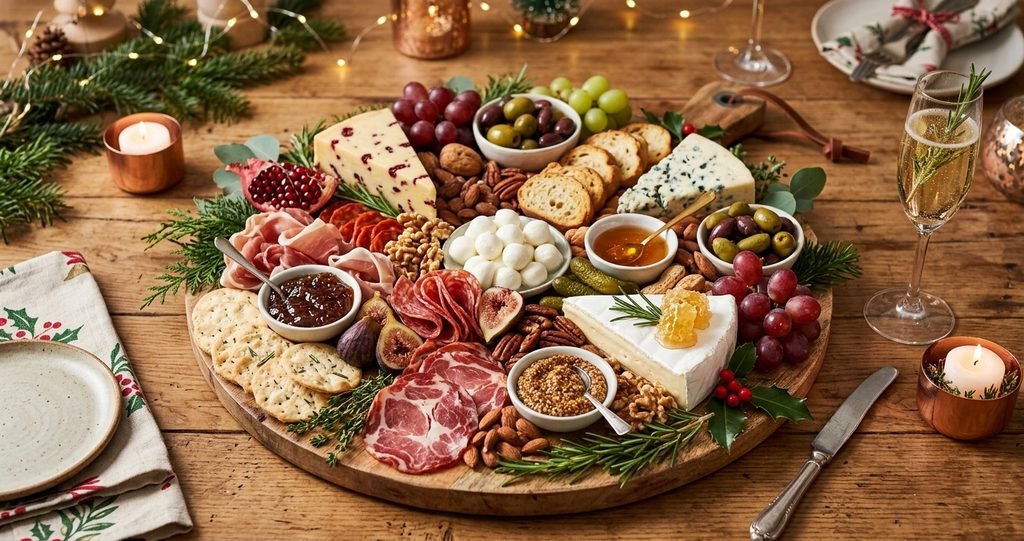
FAQ of How to Arrange a Round Charcuterie Board?
Q1. What size round charcuterie board is best?
- A 12–16 inch board is ideal for 4–8 guests, while larger gatherings may require an 18-inch or bigger board.
Q2. How many cheeses should I use?
- Three to five cheeses offer a balanced variety for most gatherings.
Q3. What’s the best centrepiece for a round board?
- A wheel of Brie or Camembert creates a beautiful focal point.
Q4. Should crackers go around the edge?
- Yes, arranging crackers in curved sections around the edge improves accessibility and complements the board’s shape.
Q5. How do I make my board look fuller?
- Use nuts, berries, olives, and dried fruit to fill small gaps without overcrowding the board.
Q6. Can I prepare a round charcuterie board in advance?
- Yes. Assemble most ingredients 1–2 hours ahead and add crackers and fresh herbs just before serving.
Q7. What fruit pairs best with Brie?
- Strawberries, grapes, pears, and raspberries pair wonderfully with Brie.
Q8. How much cheese do I need per person?
- Plan for approximately 2–3 ounces of cheese per guest if serving as an appetiser.
Q9. How do I keep ingredients from sliding?
- Build a snug arrangement, placing larger items first and filling gaps with smaller ingredients.
Q10. What herbs work best as garnish?
- Fresh rosemary, thyme, and mint are popular choices.
Q11. Can I create a vegetarian charcuterie board?
- Absolutely. Focus on cheeses, fruits, vegetables, nuts, crackers, and flavorful dips.
Q12. Should I slice the cheese beforehand?
- Slice some cheeses while leaving others whole to add visual variety and make serving easier.
Q13. What’s the biggest mistake when arranging a round board?
- Overcrowding one side. Aim for an even distribution of ingredients across the entire board.
Q14. What crackers work best?
- A mix of water crackers, artisan crisps, seeded crackers, and crostini provides a great variety of textures.
Q15. How do professionals style round charcuterie boards?
- They start with bowls and larger cheeses, build in circular layers, balance colors, and finish with fresh garnishes.
Final Thoughts
Learning how to arrange a round charcuterie board is about more than simply placing cheese and crackers on a serving platter. A well-designed board combines thoughtful planning, balanced ingredient placement, complementary flavors, and beautiful presentation.
Start by placing bowls and larger cheeses, then build outward with folded meats, fresh fruit, crackers, and flavorful accompaniments. Finish with herbs and small decorative touches that bring the board to life.
Whether you’re preparing a cozy date-night spread, hosting a family gathering, or creating an elegant centrepiece for a celebration, these techniques will help you design a round charcuterie board that’s both visually stunning and delicious.