How to Make a Charcuterie Board Like a Pro for Stunning Entertaining?
Let’s be honest: walking into a party and seeing a huge, artfully messy, and abundant charcuterie board feels like a special kind of magic. It’s a showstopper. It’s interactive. It’s the one spot where everyone gathers, glass in hand, chatting and grazing. For years, I admired these “grazing platters” from afar, assuming they were either wildly expensive or required an art degree to create. The truth? They are one of the easiest, most creative, and most cost-effective ways to host.
Making your own board lets you control the cost, customize the flavors, and (my favorite part) take all the credit. It’s a “recipe” with no real cooking required, just assembly. If you’ve ever wanted to build that perfect meat and cheese tray but felt too intimidated to start, this guide is for you. We’ll break down everything from the essential ingredients and perfect cheese pairings to simple design tips that look professional.
This guide will help you confidently build a beautiful, balanced board that feels restaurant-quality without the stress.
Table of Contents
What Is a Charcuterie Board, Anyway?
A charcuterie board originally comes from French culinary tradition, where charcuterie refers to cured meats like salami, ham, pâté, and sausages.
Over time, the concept has evolved into a modern “grazing board” that includes far more than meat. Today’s boards are flexible, creative, and often reflect personal taste and seasonal ingredients.
Think of it as:
- A mix of flavors (salty, sweet, creamy, tangy)
- A mix of textures (soft, crunchy, chewy, crisp)
- A visually appealing edible arrangement
Modern charcuterie boards are less about rules and more about creativity and balance.
The 5 Essential Ingredients for a Charcuterie Board
A great board isn’t about quantity—it’s about variety and balance. These five categories ensure your board feels complete and satisfying.
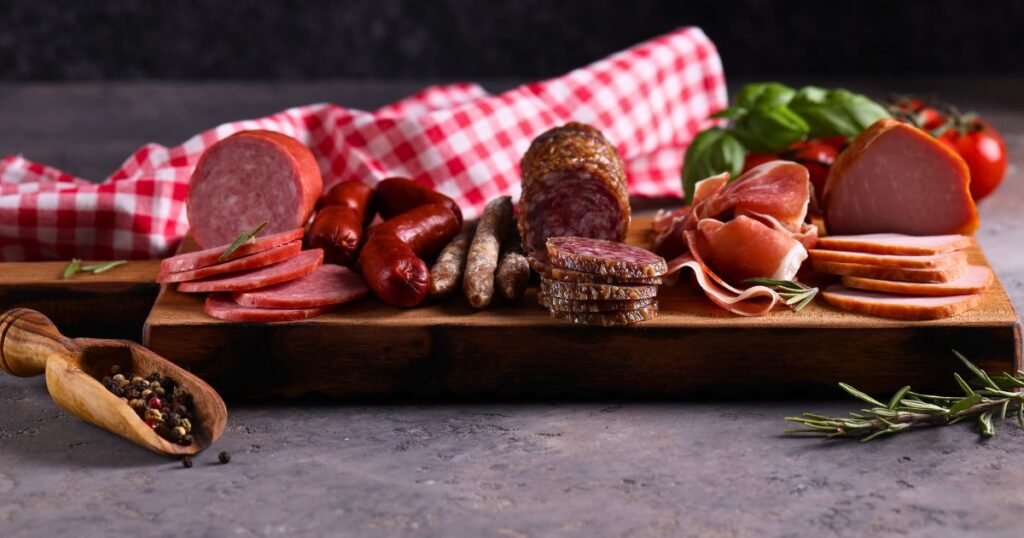
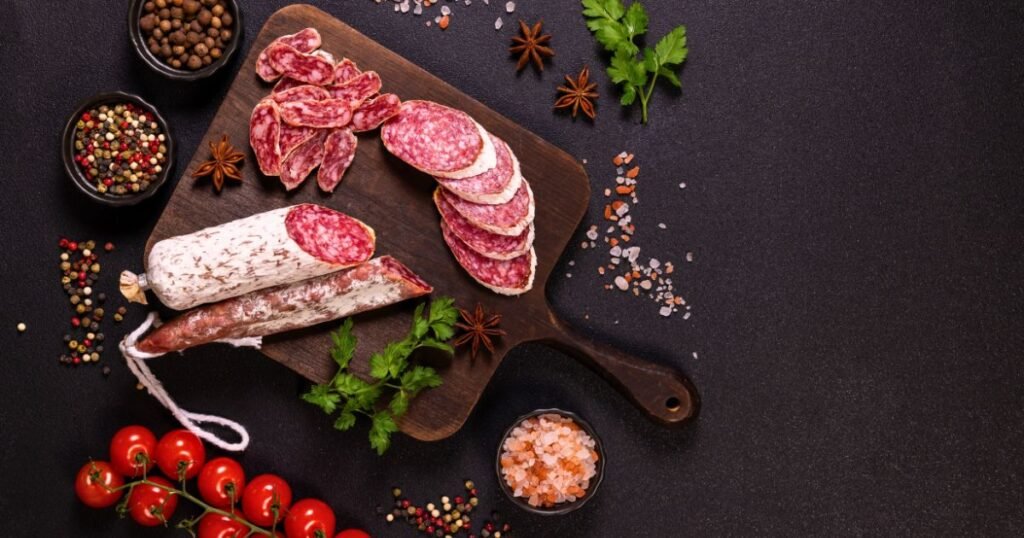
1. The Meats (Charcuterie)
Meats provide saltiness, richness, and structure.
Popular options:
- Prosciutto – soft, delicate, and melt-in-your-mouth texture
- Salami – classic, bold, and easy to fold or stack
- Chorizo – smoky, spicy, and visually vibrant
- Beef bresaola – lean and slightly sweet alternative
Tip: Always include at least two textures—one soft and one firm.
2. The Cheeses
Cheese is the centerpiece of any board, adding creaminess and depth.
Choose a mix of:
- Soft: Brie, Camembert, goat cheese
- Semi-hard: Cheddar, Gouda, Havarti
- Hard: Parmesan, aged Manchego
- Bold: Blue cheese or Gorgonzola
Pro tip: Always include at least one mild cheese so everyone feels comfortable trying it.
3. The Vehicles (Carbs)
These are what you actually build bits on.
Options include:
- Water crackers (neutral base)
- Seeded or herb crackers (flavor boost)
- Toasted baguette slices
- Breadsticks or crostini
Tip: Mix crunchy and soft options for better variety.
4. The Produce (Fresh & Pickled)
This category balances richness with freshness.
Fresh fruit:
- Grapes
- Apples
- Pears
- Berries
Pickled items:
- Olives
- Cornichons
- Pickled onions
Dried fruit:
- Apricots
- Figs
- Raisins
Why it matters: Fruit cleanses the palate between rich bites.
5. The Extras (Spreads & Fillers)
These bring everything together.
- Honey (pairs well with blue cheese)
- Fig jam (brie’s best friend)
- Whole grain mustard
- Nuts (almonds, walnuts, pistachios)
Bonus idea: Add dark chocolate or honeycomb for a gourmet twist.
How to Host on a Budget: Easy Ingredient Swaps
Building a beautiful board doesn’t need to break the bank. Here are a few of my go-to tips for keeping costs down.
Smart saving tips:
- Buy cheese in blocks instead of pre-sliced packs
- Use seasonal fruits for better price and flavor
- Replace imported meats with local deli options
- Add fillers like popcorn or pretzels for volume
Budget boards can still look premium if arranged well.
Choosing the Right Cheese for Your Charcuterie Board
This is where people get stuck, but it’s easy if you follow one rule: Variety is key. You want a mix of flavors and textures so every bite is a new discovery.
For a well-rounded board, I always recommend choosing 3, 4, or 5 cheeses from these categories.
Soft & Creamy
- Brie, Camembert, goat cheese
Best with: honey, fruit, nuts
Semi-Soft & Firm
- Cheddar, Gouda, Havarti
Best with: apples, salami, mustard
Hard & Aged
- Parmesan, Manchego
Best with: dried fruit, almonds
Blue Cheese (Bold Option)
- Gorgonzola, Stilton
Best with: honey, pears, walnuts
Extra tip: Place cheeses at different points on the board to guide visual flow. perfectly cutting cheese
Need more help? Check out our complete guide to perfectly cutting cheese for your charcuterie board.
Building Your Charcuterie Board: A Step-by-Step Recipe
This is the fun part. Think of yourself as an artist and the board as your canvas.
Step 1: Choose Your Board
You can use:
- Wooden cutting boards
- Marble slabs
- Slate trays
- Even baking trays lined with parchment
Choose size based on guest count.
Step 2: Place Your “Anchors”
Start with:
- Small bowls (for dips, olives, honey)
- Cheese placement (spread evenly across the board)
Cut variety:
- Cubes
- Wedges
- Slices
- Whole pieces
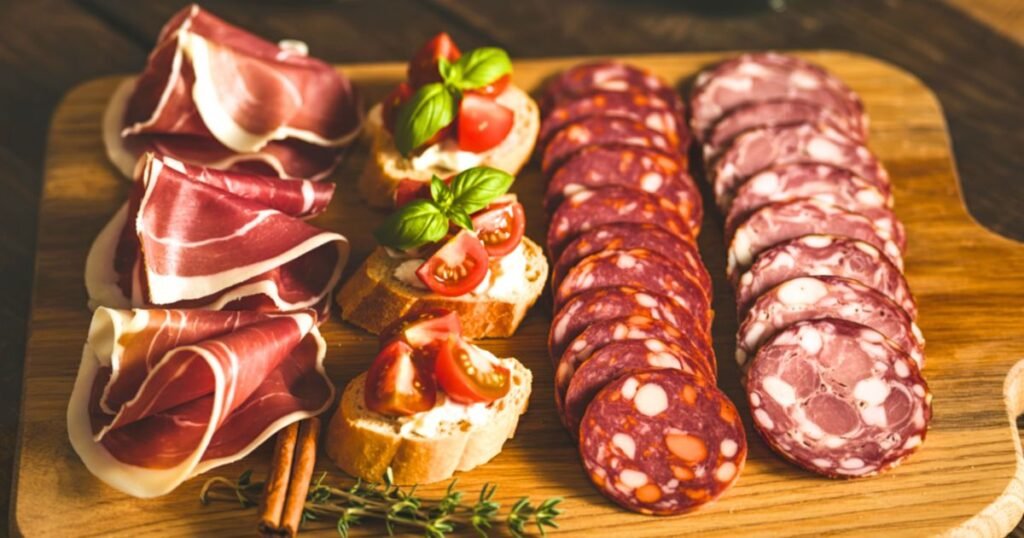
Step 3: Add the Meats
Make it visually appealing:
- Fold salami into “roses.”
- Drape prosciutto softly
- Fan out sliced meats
Avoid flat, boring placement.
Step 4: Add Crackers and Bread
- Place near complementary cheeses
- Spread them across the board
- Avoid clustering in one area
Step 5: Fill Every Gap
This is the secret to a luxury look.
Fill with:
- Grapes
- Nuts
- Berries
- Small chocolates
Rule: No space should remain visible.
Step 6: Final Garnish
Add freshness and aroma:
- Rosemary sprigs
- Thyme
This elevates the presentation instantly.
Quick Design Tips for an Impressive Board
- Use color contrast (light + dark foods together)
- Mix textures (crispy + creamy + chewy)
- Create flow instead of symmetry
- Avoid grouping similar colors in one area
How to Photograph Your Charcuterie Board
Best lighting:
- Natural daylight near a window
Best angles:
- Overhead flat lay
- 45-degree angled shot
Pro tip:
- Add hands or wine glasses for lifestyle appeal
Best Charcuterie Board Combinations (Themed Ideas)
Once you master the basics, you can create themed boards for any season or occasion.
- The Mediterranean Board: Focus on hummus, tzatziki, feta cubes, olives, marinated artichoke hearts, cucumber slices, and pita bread.
- The Holiday Board: Use seasonal colors. Think cranberry jam, a brie wedge topped with pomegranate seeds, rosemary sprigs for “wreaths,” and gingerbread cookies.
- The Vegetarian Board: Ditch the meat and double down on cheese. Add roasted red peppers, veggie sticks (carrots, bell peppers), and maybe a small bowl of warm baked feta.
Serving and Storage Tips
- Prep ingredients 1 day ahead
- Assemble just before serving
- Keep cheese at room temperature (30–45 min before serving)
- Avoid leaving food out more than 2 hours
Storage tip: Wrap cheese in parchment paper, not plastic.
Frequently Asked Questions for How to Make a Charcuterie Board
Q: How far in advance can I prepare a charcuterie board?
- You can prep ingredients up to 24 hours ahead, but assemble the board 1–2 hours before serving for best freshness and texture.
Q: How much food should I plan per person?
- Plan about 2–3 oz of cheese and 2 oz of meat per person as an appetizer, or double that if it’s the main snack or meal.
Q: Can I make a charcuterie board without meat?
- Yes. A vegetarian board works great using cheeses, fruits, nuts, dips, roasted vegetables, and crackers for a full flavor experience.
Q: What is the best board to use?
- Wooden boards are the most popular for presentation, but marble, slate, or even a clean tray can work just as well.
Q: How do I keep crackers from getting soft?
- Add crackers just before serving and keep them away from moist ingredients like fruits or dips until the last moment.
Q: What cheeses are best for beginners?
- Start with brie, cheddar, and gouda—they are mild, crowd-pleasing, and easy to pair with fruits and meats.
Conclusion: It’s Your Turn!
A charcuterie board is one of the easiest ways to elevate any gathering without complicated cooking. It blends creativity, flavor balance, and visual appeal into one simple setup that anyone can build. The key is not perfection, but variety—mix textures, colors, and flavors so every bite feels different and exciting. Soft cheeses, cured meats, fresh fruits, crunchy crackers, and sweet spreads all work together to create a complete experience.
Once you understand the basic structure, you can adapt it endlessly for holidays, parties, or casual nights at home. Whether you keep it simple or go fully artistic, a well-built charcuterie board always leaves a lasting impression.
In the end, it’s not just food on a board—it’s a shared experience that brings people together.