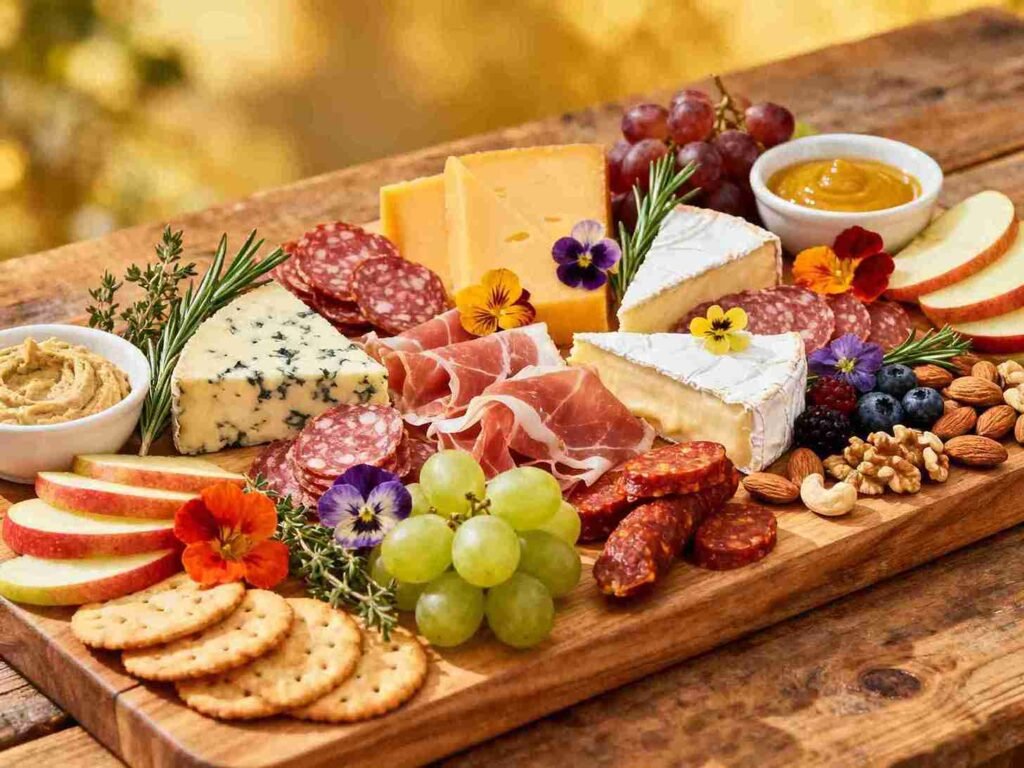
Let’s be honest: walking into a party and seeing a huge, artfully messy, and abundant charcuterie board feels like a special kind of magic. It’s a showstopper. It’s interactive. It’s the one spot where everyone gathers, glass in hand, chatting and grazing.
For years, I admired these “grazing platters” from afar, assuming they were either wildly expensive or required an art degree to create. The truth? They are one of the easiest, most creative, and most cost-effective ways to host.
Making your own board lets you control the cost, customize the flavors, and (my favorite part) take all the credit. It’s a “recipe” with no real cooking required just assembly.
If you’ve ever wanted to build that perfect meat and cheese tray but felt too intimidated to start, this guide is for you. We’ll break down everything from the essential ingredients and perfect cheese pairings to simple design tips that look professional.
What Is a Charcuterie Board, Anyway?
The word charcuterie (pronounced shar-koo-tuh-ree) is French. It traditionally refers to the art of preparing and assembling cured meats and other meat products. A traditional charcuterie board was just that: a plank piled high with pâté, salami, prosciutto, and terrines.
But language evolves, and so has this board.
Today, what we call a “charcuterie board” is more of a “grazing board.” The meats are still a star, but they now share the spotlight with a curated cast of cheeses, fruits, nuts, crackers, and spreads. It’s less of a strict recipe and more of a delicious, edible collage.
The 5 Essential Ingredients for a Charcuterie Board
The secret to a great board isn’t about having the most expensive ingredients; it’s about having the right variety. I like to think of it in five categories. Aim to have at least one or two items from each.
- 1. The Meats (Charcuterie): This is the savory, salty foundation.
- Prosciutto: A delicate, salty Italian ham. Its thin, ribbon-like texture is a must-have.
- Hard Salami: (Like Soppressata or Genoa) Easy to slice or fold, it provides a familiar, robust flavor.
- Chorizo: A Spanish, paprika-spiced sausage that adds a pop of color and spice.
- 2. The Cheeses: The heart and soul of the modern board. We’ll cover this in-depth next, but aim for variety (soft, hard, and something “funky”).
- 3. The Vehicles (Carbs): You need something to scoop and stack on.
- Crackers: Get a “basic” one (like a water cracker) and a “fancy” one (like a fig and-seed crisp).
- Breads: Sliced baguette (toasted or fresh), mini breadsticks.
- 4. The Produce (Fresh & Pickled): This is where you add bright colors and cut through the richness.
- Fresh Fruit: Grapes, berries (blackberries, raspberries), and sliced apples or pears are perfect.
- Dried Fruit: Apricots, figs, or cherries add a concentrated, chewy sweetness.
- Pickled (Brine): Cornichons (tiny pickles), olives, and pickled red onions add a sharp, acidic bite.
- 5. The Extras (Spreads & Fillers): These are the flavor-boosters and gap-fillers.
- Spreads: Fig jam (my personal favorite with brie), honey (especially for blue cheese), whole-grain mustard.
- Nuts: Almonds, walnuts, or pistachios. They fill small gaps and add a vital crunch.
How to Host on a Budget: Easy Ingredient Swaps
Building a beautiful board doesn’t need to break the bank. Here are a few of my go-to tips for keeping costs down.
- Shop Your Pantry First: You probably already have jam, mustard, pickles, olives, or a handful of nuts. Use them!
- Buy Cheese Wedges: Pre-sliced or cubed cheese is always more expensive. Buy a block or wedge and cut it yourself.
- Use Seasonal Fruit: In-season fruit is cheaper and tastes better. Use apples and pears in the fall, and fresh berries in the summer.
- The “One” Rule: You don’t need three types of meat and five types of cheese. For a smaller gathering, one good salami and one crowd-pleasing cheese (like a sharp cheddar or creamy brie) is perfectly fine.
Choosing the Right Cheese for Your Charcuterie Board
This is where people get stuck, but it’s easy if you follow one rule: Variety is key. You want a mix of flavors and textures so every bite is a new discovery.
For a well-rounded board, I always recommend choosing 3, 4, or 5 cheeses from these categories.
- Soft & Creamy: This is your “spreadable” cheese.
- Examples: Brie, Camembert, or a fresh chèvre (goat cheese).
- Why: They are mild, buttery, and incredibly popular. Brie is practically a requirement.
- Pairs With: Fig jam, fresh berries, and prosciutto.
- Semi-Soft & Firm: These are the crowd-pleasers.
- Examples: Smoked Gouda, Havarti (especially dill), or a young Cheddar.
- Why: They slice beautifully and have a satisfying, snackable flavor.
- Pairs With: Sliced apples, hard salami, and whole-grain mustard.
- Hard & Aged: These add a sharp, complex, salty flavor.
- Examples: Aged Cheddar (sharp white), Manchego (a Spanish sheep’s milk cheese), Parmesan, or Asiago.
- Why: They have a crystallized texture that’s fantastic with sweet spreads.
- Pairs With: Honey, dried apricots, and almonds.
- Blue (The “Funky”): This is your bold, “wow” flavor.
- Examples: Gorgonzola (milder) or Stilton (stronger).
- Why: Even if not everyone loves it, those who do will be thrilled. Its sharp, tangy flavor is a perfect contrast.
- Pairs With: Honey, walnuts, and pears.
Need more help? Check out our complete guide to the Perfectly Cutting Cheese for Your Charcuterie Board
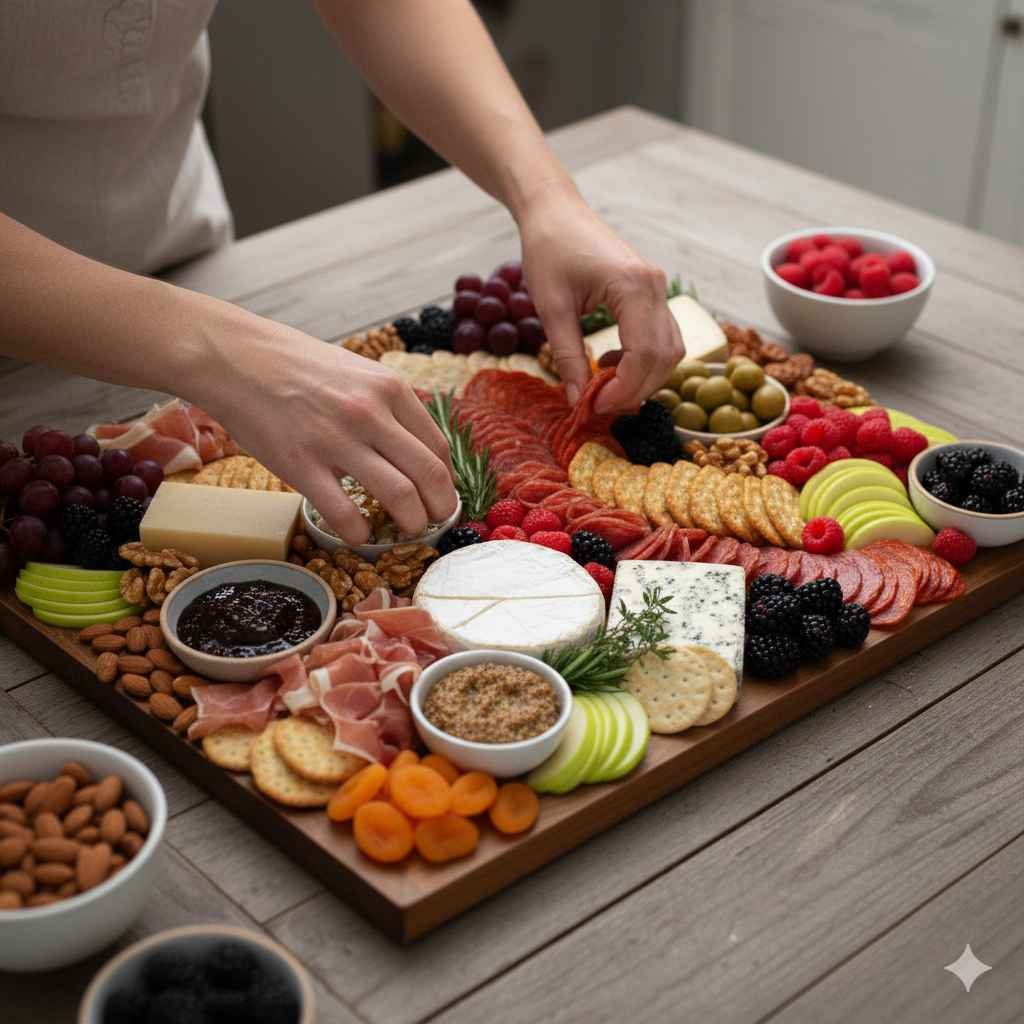
Building Your Charcuterie Board: A Step-by-Step Recipe
This is the fun part. Think of yourself as an artist and the board as your canvas.
Step 1: Choose Your Board
It doesn’t have to be a fancy, expensive “charcuterie board.” Any large, food-safe surface will do. A big wooden cutting board (my personal go-to), a slate tile, a marble pastry slab, or even a clean baking sheet lined with parchment paper works beautifully.
Check out our guide to Creating Your Own Charcuterie Board from Wood.
Step 2: Place Your “Anchors” (Bowls & Cheese)
First, place any small bowls you’re using for spreads, jams, or olives. I always use 2 or 3. This gives your board structure.
Next, place your cheeses. Spread them out across the board, leaving space between them. I like to cut the cheeses differently for visual interest:
- Brie: Serve as a whole wedge (or wheel).
- Hard Cheese: Cut into cubes or triangles.
- Firm Cheese: Cut into slices or sticks.
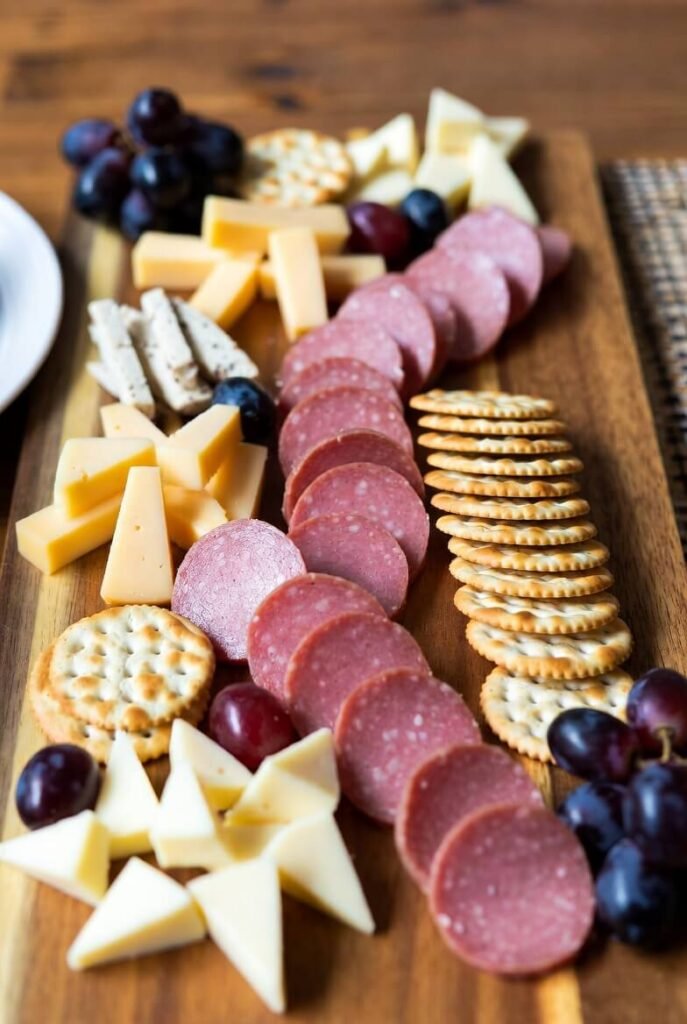
Step 3: Add the Meats
This is where you get creative. Don’t just lay the meat flat.
- The Salami River: This is a popular and easy trick. Fold salami slices in half, and then in half again to create a “quarter” fold. Line them up, overlapping, in a winding “S” shape across the board.
- Prosciutto “Roses”: Gently drape and bunch thin slices of prosciutto into loose, flower-like piles.
- Salami Slices: You can also fan out larger, thin slices around a bowl.
Step 4: Add Your Crackers and Bread
Fan out your crackers and baguette slices in graceful curves. I like to place them near the cheeses they pair well with. For example, put the seed crisps right next to the goat cheese. Don’t put all the crackers in one spot; weave them through the board.
Step 5: Fill the Gaps (The Fun Part)
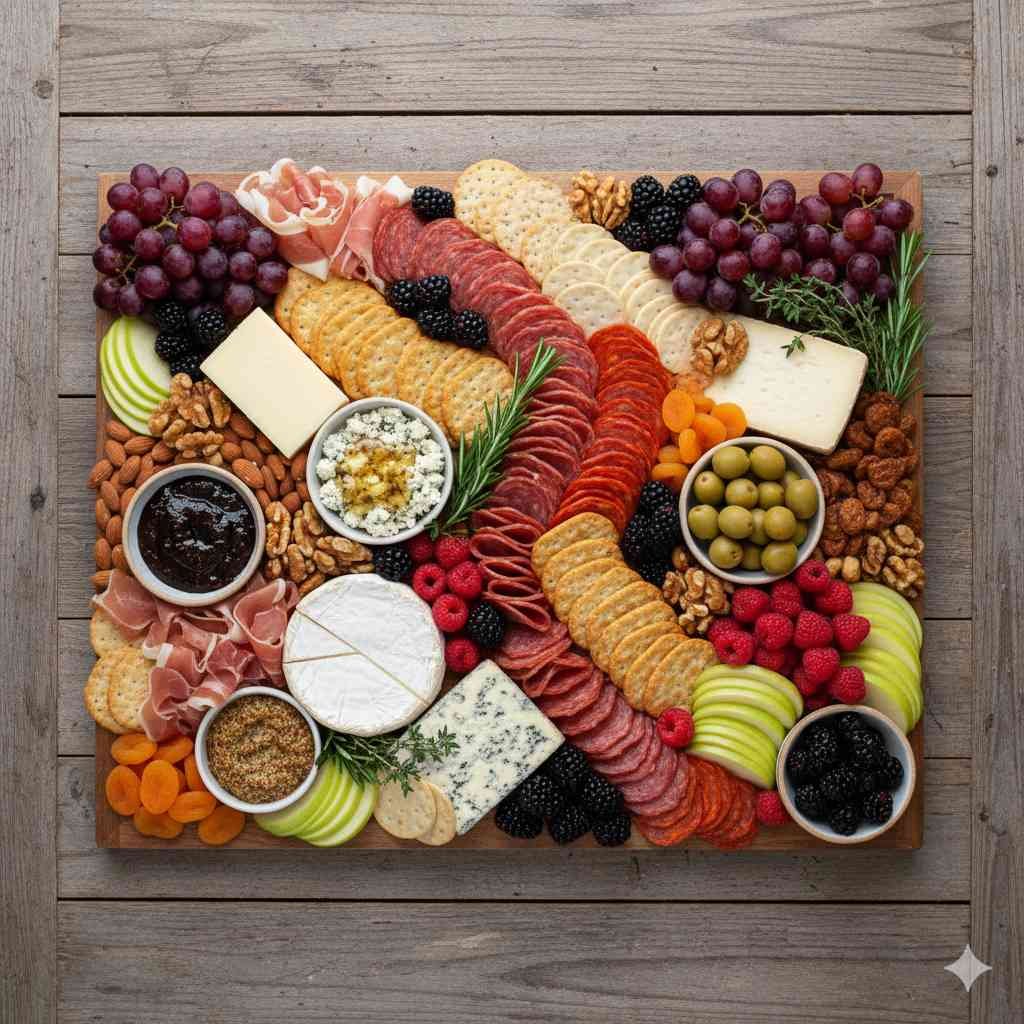
Your board has “anchors” (cheese), “rivers” (meat), and “paths” (crackers). Now, you fill every single empty space with your “extras.” This is the secret to an abundant, professional-looking board.
- Fill large gaps with handfuls of grapes or berries.
- Fill medium gaps with nuts (almonds, pistachios).
- Fill the tiniest gaps with dried fruit or single berries.
The goal is to have no part of the board showing. This creates that feeling of abundance and luxury.
Step 6: The Final Garnish
This final touch makes all the difference. Tuck a few small sprigs of fresh rosemary or thyme around the board. The pop of green against the reds and yellows is beautiful, and the aroma is lovely.
Finally, add your serving utensils. Place small cheese knives in each cheese and tiny spoons in the jams. You’re ready to serve!
Quick Design Tips for an Impressive Board
- Color: Think about the color wheel. Don’t put all the “white” things (brie, water crackers) together. Break them up with the red of raspberries, the black of olives, and the green of herbs.
- Texture: Balance creamy brie next to crisp apple slices. Place crunchy nuts next to soft, draped prosciutto. This sensory contrast is what makes a board exciting to eat.
- Flow: By creating a “salami river” or fanning crackers in a curve, you give the board a sense of motion that draws the eye.
How to Photograph Your Charcuterie Board
You made a masterpiece, so you’ll want to share it! For the best food photo:
- Use Natural Light: Always. Set your board up near a window. Turn off your overhead kitchen lights they create a yellow, harsh glow.
- Find Your Angle: The two best shots are:
- The Flat Lay: Directly overhead. This shows off all the ingredients and your careful arrangement.
- The 45-Degree Angle: This gives a sense of C and shows the height and texture of the ingredients.
Best Charcuterie Board Combinations (Themed Ideas)
Once you master the basics, you can create themed boards for any season or occasion.
- The Mediterranean Board: Focus on hummus, tzatziki, feta cubes, olives, marinated artichoke hearts, cucumber slices, and pita bread.
- The Holiday Board: Use seasonal colors. Think cranberry jam, a brie wedge topped with pomegranate seeds, rosemary sprigs for “wreaths,” and gingerbread cookies.
- The Vegetarian Board: Ditch the meat and double down on cheese. Add roasted red peppers, veggie sticks (carrots, bell peppers), and maybe a small bowl of warm baked feta.
Serving and Storage Tips
- Prep Ahead: You can slice all your meats, cheeses, and fruits a day in advance. Store them in separate airtight containers in the fridge.
- Assemble Just Before: Assemble the board no more than an hour before guests arrive. Crackers will get soggy, and cheeses will dry out if left too long.
- Serving Temperature: Cheese has the best flavor at room temperature. Take your cheeses out of the fridge about 30-45 minutes before serving. Meats should stay refrigerated until just before assembly.
- Leftovers: Discard anything that’s been at room temperature for more than 2 hours. Wrap leftover cheese in wax or parchment paper (not plastic wrap, which traps moisture) and store meats separately.
Conclusion: It’s Your Turn!
The most important rule of charcuterie is that there are no rules.
A charcuterie board is a personal art form. It’s a chance to play with your food, be creative, and bring people together. Don’t worry about making it “perfect.” Just fill it with the flavors you love, and your guests will love it, too.
So, head to the store, grab a few of your favorite things, and craft your own charcuterie masterpiece this weekend.
Frequently Asked Questions (FAQs)
Q: How far in advance can I make a charcuterie board?
A: You can prep all the ingredients (slice cheese, wash fruit) up to 24 hours in advance. However, you should assemble the board right before serving, or at most, 1-2 hours ahead (cover loosely with plastic wrap and keep refrigerated). Add crackers just before setting it out so they stay crisp.
Q: How much food do I need per person?
A: A good rule of thumb:
- As an appetizer: 2-3 ounces of cheese and 2 ounces of meat per person.
- As a main meal: 4-5 ounces of cheese and 4 ounces of meat per person.
When in doubt, always make a little extra!
Q: What if I don’t eat pork?
A: No problem! There are fantastic non-pork options. Look for smoked turkey slices, beef bresaola (an Italian cured beef), or go for a “seacuterie” board with smoked salmon. You can also make a beautiful vegetarian board that skips the meat entirely.
Q: What is the best board to use?
A: Any food-safe, non-porous surface works. Wood (acacia, olive, or bamboo) is classic and beautiful. Slate or marble boards also look incredibly elegant and help keep cheeses cool. In a pinch, a large ceramic platter or even a clean baking sheet will do the trick.